- Angular Tutorial
- Angular - Home
- Angular - Overview
- Angular - Features
- Angular - Advantages & Disadvantages
- Angular Basics
- Angular - Environment setup
- Angular - First Application
- Angular - MVC Architecture
- Angular Components
- Angular - Components
- Angular - Component Lifecycle
- Angular - View Encapsulation
- Angular - Component Interaction
- Angular - Component Styles
- Angular - Nested Components
- Angular - Content projection
- Angular - Dynamic components
- Angular - Elements
- Angular Templates
- Angular - Templates
- Angular - Template statements
- Angular - Template Variables
- Angular - SVG as Templates
- Angular Binding
- Angular - Data Binding
- Angular - Interpolation
- Angular - Event Binding
- Angular - Property Binding
- Angular - Attribute Binding
- Angular - Class Binding
- Angular - Style Binding
- Angular - Two-way Binding
- Angular Directives
- Angular - Directives
- Angular - Attribute Directives
- Angular - Structural Directives
- Angular - Custom Directives
- Angular Pipes
- Angular - Pipes
- Angular - Built-in Pipes
- Angular - Custom Pipes
- Angular Forms
- Angular - Forms
- Angular - Template Driven Forms
- Angular - Reactive Forms
- Angular - Form Validation
- Angular - Dynamic Forms
- Angular Dependency Injection
- Angular - Dependency Injection
- Angular - Injectable Service
- Angular Routing
- Angular - Routing
- Angular - Dynamic Routes
- Angular - Wildcard Routes
- Angular - Nested Routes
- Angular - Navigation
- Angular - Routing in SPA
- Angular - Custom Route Matches
- Angular - Router Reference
- Angular HTTP Client programming
- Angular - Services
- Angular - HTTP Client
- Angular - Request
- Angular - Response
- Angular - GET
- Angular - POST
- Angular - PUT
- Angular - DELETE
- Angular - JSONP
- Angular - CRUD Operations Using HTTP
- Angular Modules
- Angular - Introduction to Modules
- Angular - Root Module
- Angular - Feature Module
- Angular - Sharing Module
- Angular - Routing Module
- Angular - NgModules
- Angular Animation
- Angular - Animations
- Angular Service Workers & PWA
- Angular - Service Workers & PWA
- Angular Testing
- Angular - Testing Overview
- Angular Design Patterns
- Angular - Design Patterns
- Angular - Lazy Loading
- Angular - Singleton Pattern
- Angular - Observer Pattern
- Angular Libraries
- Angular - Libraries
- Angular - Angular Material
- Angular - PrimeNG
- Angular - RxJS
- Angular Advanced
- Angular - Signals
- Angular - Authentication & Authorization
- Angular - Internationalization
- Angular - Standalone Component
- Angular - Accessibility
- Angular - Web Workers
- Angular - Server Side Rendering
- Angular - Ivy Compiler
- Angular - Building with Bazel
- Angular - Backward Compatibility
- Angular - Reactive Programming
- Angular Tools
- Angular - CLI
- Angular Material UI Elements
- Angular - Paginator
- Angular - Datepicker
- Angular - Select Drop-down
- Angular Miscellaneous
- Angular - Third Party Controls
- Angular - Configuration
- Angular - Displaying Data
- Angular - Decorators & Metadata
- Angular - Basic Example
- Angular - Error Handling
- Angular - Testing & Building a Project
- Angular - Lifecycle Hooks
- Angular - User Input
- Angular - What's New?
- Angular Useful Resources
- Angular - Quick Guide
- Angular - Useful Resources
- Angular - Discussion
Angular - View Encapsulation
View encapsulation is a technique to encapsulate the style of the given view from other sections of the application. By default, the CSS style applied in an HTML document will affect the entire document. The same applies to the Angular framework as well. This default behaviour is going to be an advantage in some scenarios like global styles but at the same time, it may affect specific parts of the application unintentionally (like a special button/link with specific styles).
To make sure that the style of the specific part of the application does not get affected, the view encapsulation concept provided by Angular can be used.
View Encapsulation Modes in Angular
Angular provides a property named view encapsulation in the Component decoration to direct the scope of component style. There are three modes of encapsulation, which are as follows −
- None (ViewEncapsulation.None)
- Emulated (ViewEncapsulation.Emulated)
- ShadowDom (ViewEncapsulation.ShadowDom)
ViewEncapsulation.None
The mode None will not do anything to safeguard the style of an element inside the component. Component view will be exposed to all the global styles and get affected by it.
Example
Let us create a simple component to check how ViewEncapsulation.None mode works.
Step 1: Create a new Angular application with the name sample-app using the below command −
ng new sample-app
Step 2: Navigate to the project folder using cd command. Create a new component and name it view-encapsulation-sample.
$ ng generate component view-encapsulation-sample CREATE src/app/view-encapsulation-sample/view-encapsulation-sample.component.html (41 bytes) CREATE src/app/view-encapsulation-sample/view-encapsulation-sample.component.spec.ts (736 bytes) CREATE src/app/view-encapsulation-sample/view-encapsulation-sample.component.ts (320 bytes) CREATE src/app/view-encapsulation-sample/view-encapsulation-sample.component.css (0 bytes)
Step 3: Now, go to view-encapsulation-sample.component.ts file. Add ViewEncapsulation.None mode for the component as shown below −
import { Component, ViewEncapsulation } from '@angular/core'; @Component({ selector: 'app-view-encapsulation-sample', standalone: true, imports: [ViewEncapsulationSampleComponent], templateUrl: './view-encapsulation-sample.component.html', styleUrl: './view-encapsulation-sample.component.css', encapsulation: ViewEncapsulation.None }) export class ViewEncapsulationSampleComponent { } Step 4: Change the template, view-encapsulation-sample.component.html and add two containers as shown below −
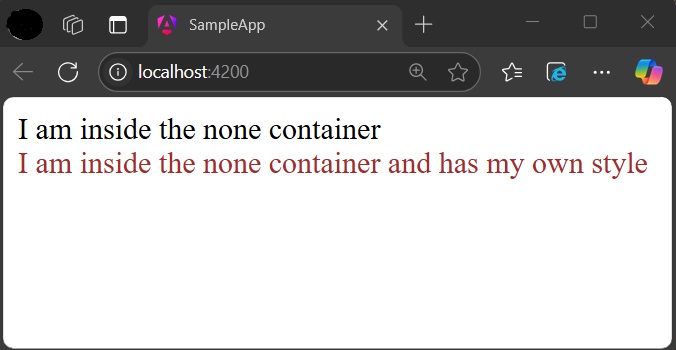
<div>I am inside the none container</div> <div class="mystyle">I am inside the none container and has my own style</div>
Here, the first container does not have any styles or class and it is more prone to get affected by the global styles. The second container has class attributes and yet has a chance to get affected by global styles.
Step 5: Apply the style in the component css file, view-encapsulation-sample.component.css as shown below −
div.mystyle { color: brown } Step 6: Add the component in the app component, app.component.html as shown below −
<app-view-encapsulation-sample /> <router-outlet></router-outlet>
Step 7: On running the application, you can clearly see that the generated style and element are plain and no safeguard is applied and the application will look as shown below −
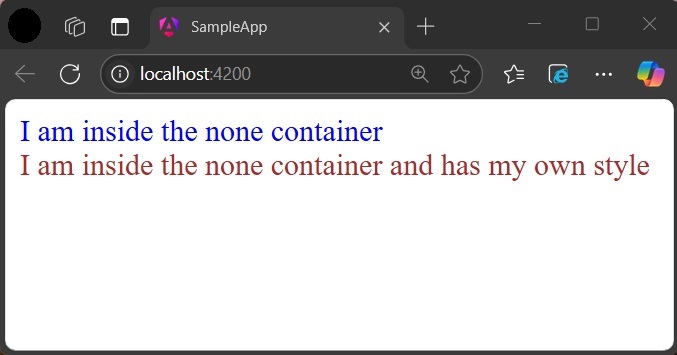
Step 8: Add a style in the global css assets, styles.css targeting div tag and re-run the application.
div { color: blue } Now, the color of the first container changed to blue as shown below −
ViewEncapsulation.Emulated
Emulated mode will change the styles in such a way that it only applies to the element inside the component only. However, global styles may still affect elements inside a component.
Example
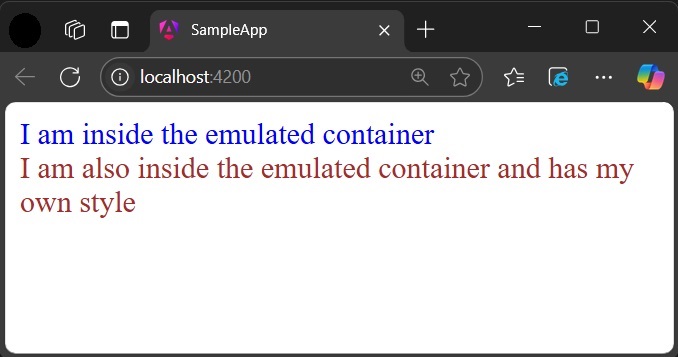
Let us change our application and apply the Emulated option as shown below −
import { Component, ViewEncapsulation } from '@angular/core'; @Component({ selector: 'app-view-encapsulation-sample', standalone: true, imports: [ViewEncapsulationSampleComponent], templateUrl: './view-encapsulation-sample.component.html', styleUrl: './view-encapsulation-sample.component.css', encapsulation: ViewEncapsulation.Emulated }) export class ViewEncapsulationSampleComponent { } Now, re-run the application and check the result −
ViewEncapsulation.ShadowDom
ShadowDom mode will apply the HTML native shadow dom concept to scope the style of the component. The element of the component will not be affected by the global styles in any situation as it completely hide using shadowDOM concept.
Example
Change our application and apply the ShadowDOM mode as shown below −
import { Component, ViewEncapsulation } from '@angular/core'; @Component({ selector: 'app-view-encapsulation-sample', standalone: true, imports: [ViewEncapsulationSampleComponent], templateUrl: './view-encapsulation-sample.component.html', styleUrl: './view-encapsulation-sample.component.css', encapsulation: ViewEncapsulation.ShadowDom }) export class ViewEncapsulationSampleComponent { } Now, re-run the application and check the output.

Now, both containers are safeguarded by native shadowDOM concept and are not affected by the global styles.
Applying different encapsulation in an application
View encapsulation of a component can be different from other components used in the application as view encapsulation is applied per component basis. Even the nested component can have different view encapsulation options as per component requirements. Angular will apply the encapsulation as directed even in very complex nested component trees as well.
Multiple Choice Questions on Angular View Encapsulation
In this section, you can check your knowledge of the angular view encapsulation by giving correct answers to the questions given below −
Q. 1 - Why we use the view encapsulation in Angular?
A - To separate Angular templates from global styles.
B - To encapsulate the style of the given view from other sections of the application.
Answer : B
Explanation
To make sure that the style of the specific part of the application does not get affected, the view encapsulation is used in Angular.
Q. 2 - Which of the following option is not a valid view encapsulation mode?
B - ViewEncapsulation.Emulated
Answer : D
Explanation
The valid view encapsulation modes are None, Emulated, and ShadowDom. ViewEncapsulation.Global is not a valid option.
Q. 3 - Name the default view encapsulation mode in Angular:
Answer : D
Explanation
By default, Angular uses ViewEncapsulation.Emulated mode.