- Angular Tutorial
- Angular - Home
- Angular - Overview
- Angular - Features
- Angular - Advantages & Disadvantages
- Angular Basics
- Angular - Environment setup
- Angular - First Application
- Angular - MVC Architecture
- Angular Components
- Angular - Components
- Angular - Component Lifecycle
- Angular - View Encapsulation
- Angular - Component Interaction
- Angular - Component Styles
- Angular - Nested Components
- Angular - Content projection
- Angular - Dynamic components
- Angular - Elements
- Angular Templates
- Angular - Templates
- Angular - Template statements
- Angular - Template Variables
- Angular - SVG as Templates
- Angular Binding
- Angular - Data Binding
- Angular - Interpolation
- Angular - Event Binding
- Angular - Property Binding
- Angular - Attribute Binding
- Angular - Class Binding
- Angular - Style Binding
- Angular - Two-way Binding
- Angular Directives
- Angular - Directives
- Angular - Attribute Directives
- Angular - Structural Directives
- Angular - Custom Directives
- Angular Pipes
- Angular - Pipes
- Angular - Built-in Pipes
- Angular - Custom Pipes
- Angular Forms
- Angular - Forms
- Angular - Template Driven Forms
- Angular - Reactive Forms
- Angular - Form Validation
- Angular - Dynamic Forms
- Angular Dependency Injection
- Angular - Dependency Injection
- Angular - Injectable Service
- Angular Routing
- Angular - Routing
- Angular - Dynamic Routes
- Angular - Wildcard Routes
- Angular - Nested Routes
- Angular - Navigation
- Angular - Routing in SPA
- Angular - Custom Route Matches
- Angular - Router Reference
- Angular HTTP Client programming
- Angular - Services
- Angular - HTTP Client
- Angular - Request
- Angular - Response
- Angular - GET
- Angular - POST
- Angular - PUT
- Angular - DELETE
- Angular - JSONP
- Angular - CRUD Operations Using HTTP
- Angular Modules
- Angular - Introduction to Modules
- Angular - Root Module
- Angular - Feature Module
- Angular - Sharing Module
- Angular - Routing Module
- Angular - NgModules
- Angular Animation
- Angular - Animations
- Angular Service Workers & PWA
- Angular - Service Workers & PWA
- Angular Testing
- Angular - Testing Overview
- Angular Design Patterns
- Angular - Design Patterns
- Angular - Lazy Loading
- Angular - Singleton Pattern
- Angular - Observer Pattern
- Angular Libraries
- Angular - Libraries
- Angular - Angular Material
- Angular - PrimeNG
- Angular - RxJS
- Angular Advanced
- Angular - Signals
- Angular - Authentication & Authorization
- Angular - Internationalization
- Angular - Standalone Component
- Angular - Accessibility
- Angular - Web Workers
- Angular - Server Side Rendering
- Angular - Ivy Compiler
- Angular - Building with Bazel
- Angular - Backward Compatibility
- Angular - Reactive Programming
- Angular Tools
- Angular - CLI
- Angular Material UI Elements
- Angular - Paginator
- Angular - Datepicker
- Angular - Select Drop-down
- Angular Miscellaneous
- Angular - Third Party Controls
- Angular - Configuration
- Angular - Displaying Data
- Angular - Decorators & Metadata
- Angular - Basic Example
- Angular - Error Handling
- Angular - Testing & Building a Project
- Angular - Lifecycle Hooks
- Angular - User Input
- Angular - What's New?
- Angular Useful Resources
- Angular - Quick Guide
- Angular - Useful Resources
- Angular - Discussion
Angular - Two-Way Data Binding
Two-Way Data Binding in Angular
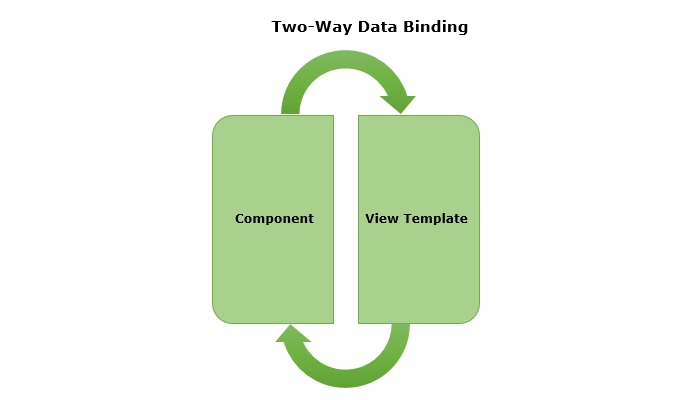
Two-way data binding is a two-directional interaction in Angular. In this type of data binding, data flows in both ways, from the component to views and from the views back to the component. When you bind a value into an element then, two-way binding gives that element the ability to apply changes back to the source. It is the combination of property and event binding.
The term Data binding refers to a mechanism that allows flow of data between component class to template and template to component class.

Implementing Two-Way Binding
We can use the following ways to implement two-way binding in Angular −
Two-Way Binding using ngModel
The ngModel is a directive in Angular that is used for two-way data binding between the component class and the HTML template. It helps to sync the data between the model in the component and the view in template. This directive is commonly used on form controls, such as <input>, <textarea>, and <select> to bind them to a component property.
When the user interacts with the input field of a form, the value of the input is automatically updated in the component property. Similarly, if the component property is changed by any means, the input field is automatically updated to reflect the new value.
Syntax
For two-way binding using ngModel, we use 'banana-in-a-box syntax' which is shown below −
<HTML [(ngModel)]="model.name" />
Where,
- [(ngModel)]: The parentheses () represent the event binding and the square brackets [] represent property binding.
- model.name: This is the component property that will be linked to the form control.
Example
In this example, we are demonstrating two-way data binding in Angular. We bind a form control to a component property using the ngModel directive. This will allow the input field to update the component's user property and reflect any changes made to this property in the view immediately.
Step 1: Create an Angular application named formApp using the command given below −
ng new formApp
Step 2: Import FormsModule first and then define a variable user inside src/app/app.component.ts. FormModule will do the necessary setup to enable two-way data binding.
import { Component } from '@angular/core'; import { RouterOutlet } from '@angular/router'; import { FormsModule } from '@angular/forms'; @Component({ selector: 'app-root', standalone: true, imports: [RouterOutlet, FormsModule], templateUrl: './app.component.html', styleUrl: './app.component.css' }) export class AppComponent { title = 'Two Way Binding'; user: string = ''; } Step 3: Update the view template, app.component.html as mentioned below −
<h3>{{ title }}</h3> <input type="text" [(ngModel)]="user" /> <p>Welcome {{ user }}!</p> <router-outlet /> Here,
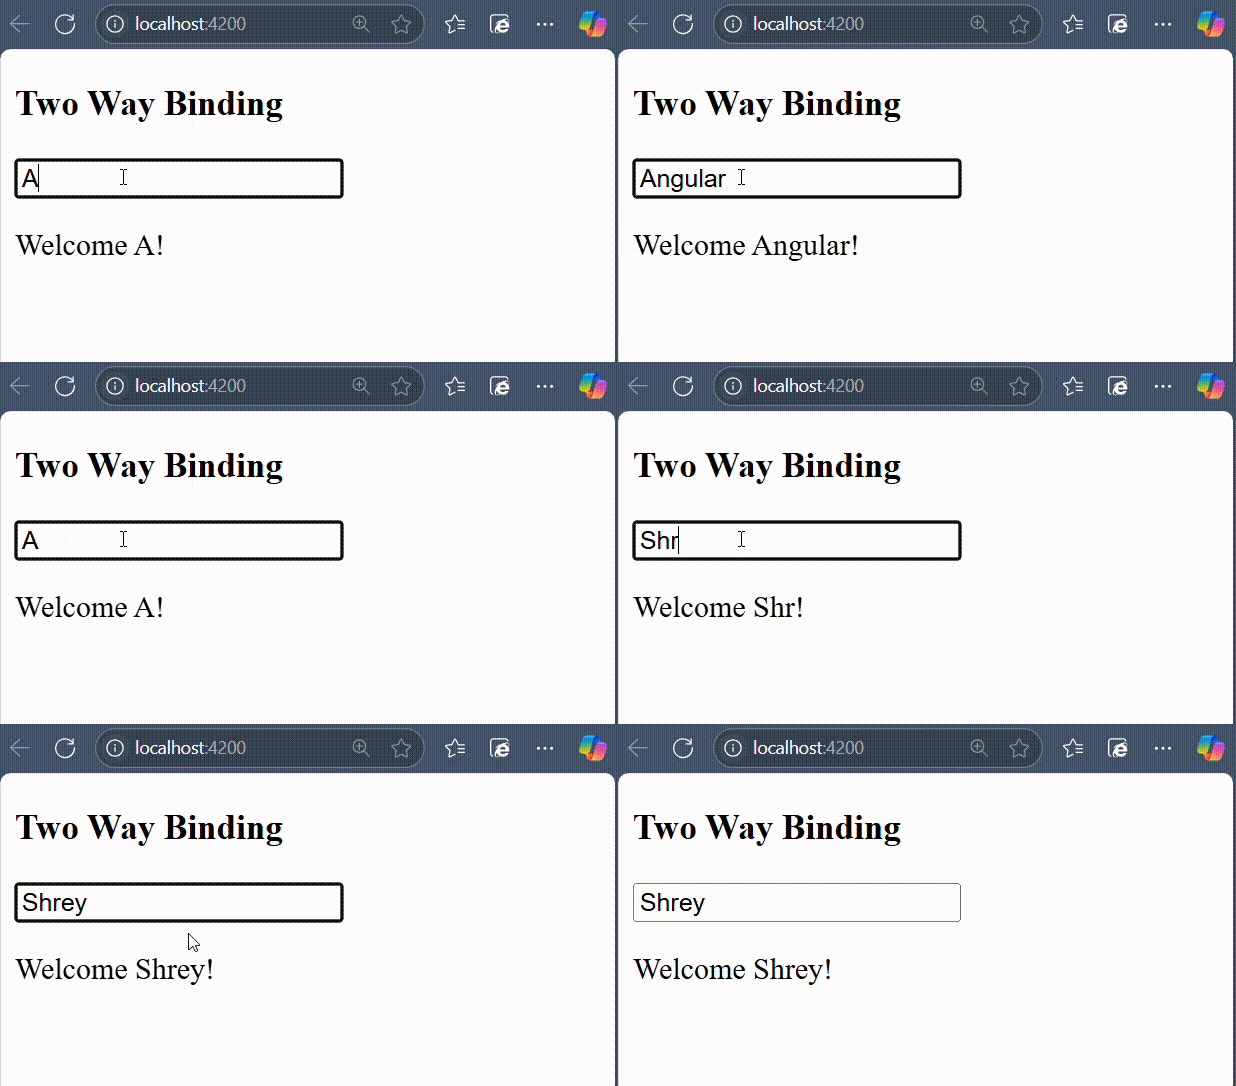
The user property is bind to form control using ngModel directive. If you enter any text in the input box, it will update the user property.
Finally, start your application using the below command −
ng serve
After running your application, you could see a response as given below −

Try to change the input value to any string of your choice. You will get the output as per the given input.
NOTE: We will learn more about form controls in the upcoming chapters.
Two-Way Binding using custom Event and Property Binding
As mentioned earlier, if we combine event and property binding, we can achieve two-way binding. It is mainly used when we need to establish two-directional interaction between a parent and its child component. Compare to ngModel, using custom event and property binding requires more configuration.
To enable two-way binding between components, the @Input() property and corresponding @Output property along with an event emitter method that updates the value of the @Input() needs to defined inside child component.
Inside the parent component, wrap the @Input() property name in the 'banana-in-a-box syntax' and specify the corresponding property to which the updated value is assigned.
Example
In this example, we are illustrating two-way data binding by combining event and property binding together.
Step 1: Create an Angular application named customApp using the command given below −
ng new customApp
Step 2: Next, generate a child component named child-component.
ng generate component child-component CREATE src/app/child-component/child-component.component.html (31 bytes) CREATE src/app/child-component/child-component.component.spec.ts (672 bytes) CREATE src/app/child-component/child-component.component.ts (281 bytes) CREATE src/app/child-component/child-component.component.css (0 bytes)
Step 3: Open child-component.component.ts file and add the following code −
import { Component, EventEmitter, Input, Output } from '@angular/core'; import { FormsModule } from '@angular/forms'; @Component({ selector: 'app-child-component', standalone: true, imports: [FormsModule], template: '<input [value]="val" (input)="onValChange($event)" />', styleUrls: ['./child-component.component.css'] }) export class ChildComponentComponent { @Input() val: string = ''; @Output() valChange: EventEmitter<string> = new EventEmitter<string>(); onValChange(event: Event) { // Cast the event target to HTMLInputElement and access the value const input = event.target as HTMLInputElement; if (input) { this.valChange.emit(input.value); } } } Step 4: Add the following code inside app.component.ts file −
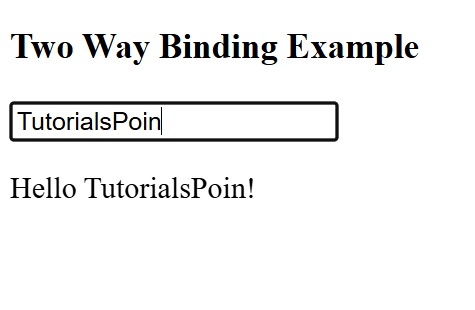
import { Component } from '@angular/core'; import { FormsModule } from '@angular/forms'; import { RouterOutlet } from '@angular/router'; import { ChildComponentComponent } from './child-component/child-component.component'; @Component({ selector: 'app-root', standalone: true, imports: [RouterOutlet, FormsModule, ChildComponentComponent], template: `<h3>{{ title }}</h3> <app-child-component [(val)]="user"></app-child-component> <p>Hello {{ user }}!</p>`, styleUrl: './app.component.css' }) export class AppComponent { title = 'Two Way Binding Example'; user: string = ""; } Now, start your application using the below command −
ng serve
After running your application, you could see the following output −
