- Angular Tutorial
- Angular - Home
- Angular - Overview
- Angular - Features
- Angular - Advantages & Disadvantages
- Angular Basics
- Angular - Environment setup
- Angular - First Application
- Angular - MVC Architecture
- Angular Components
- Angular - Components
- Angular - Component Lifecycle
- Angular - View Encapsulation
- Angular - Component Interaction
- Angular - Component Styles
- Angular - Nested Components
- Angular - Content projection
- Angular - Dynamic components
- Angular - Elements
- Angular Templates
- Angular - Templates
- Angular - Template statements
- Angular - Template Variables
- Angular - SVG as Templates
- Angular Binding
- Angular - Data Binding
- Angular - Interpolation
- Angular - Event Binding
- Angular - Property Binding
- Angular - Attribute Binding
- Angular - Class Binding
- Angular - Style Binding
- Angular - Two-way Binding
- Angular Directives
- Angular - Directives
- Angular - Attribute Directives
- Angular - Structural Directives
- Angular - Custom Directives
- Angular Pipes
- Angular - Pipes
- Angular - Built-in Pipes
- Angular - Custom Pipes
- Angular Forms
- Angular - Forms
- Angular - Template Driven Forms
- Angular - Reactive Forms
- Angular - Form Validation
- Angular - Dynamic Forms
- Angular Dependency Injection
- Angular - Dependency Injection
- Angular - Injectable Service
- Angular Routing
- Angular - Routing
- Angular - Dynamic Routes
- Angular - Wildcard Routes
- Angular - Nested Routes
- Angular - Navigation
- Angular - Routing in SPA
- Angular - Custom Route Matches
- Angular - Router Reference
- Angular HTTP Client programming
- Angular - Services
- Angular - HTTP Client
- Angular - Request
- Angular - Response
- Angular - GET
- Angular - POST
- Angular - PUT
- Angular - DELETE
- Angular - JSONP
- Angular - CRUD Operations Using HTTP
- Angular Modules
- Angular - Introduction to Modules
- Angular - Root Module
- Angular - Feature Module
- Angular - Sharing Module
- Angular - Routing Module
- Angular - NgModules
- Angular Animation
- Angular - Animations
- Angular Service Workers & PWA
- Angular - Service Workers & PWA
- Angular Testing
- Angular - Testing Overview
- Angular Design Patterns
- Angular - Design Patterns
- Angular - Lazy Loading
- Angular - Singleton Pattern
- Angular - Observer Pattern
- Angular Libraries
- Angular - Libraries
- Angular - Angular Material
- Angular - PrimeNG
- Angular - RxJS
- Angular Advanced
- Angular - Signals
- Angular - Authentication & Authorization
- Angular - Internationalization
- Angular - Standalone Component
- Angular - Accessibility
- Angular - Web Workers
- Angular - Server Side Rendering
- Angular - Ivy Compiler
- Angular - Building with Bazel
- Angular - Backward Compatibility
- Angular - Reactive Programming
- Angular Tools
- Angular - CLI
- Angular Material UI Elements
- Angular - Paginator
- Angular - Datepicker
- Angular - Select Drop-down
- Angular Miscellaneous
- Angular - Third Party Controls
- Angular - Configuration
- Angular - Displaying Data
- Angular - Decorators & Metadata
- Angular - Basic Example
- Angular - Error Handling
- Angular - Testing & Building a Project
- Angular - Lifecycle Hooks
- Angular - User Input
- Angular - What's New?
- Angular Useful Resources
- Angular - Quick Guide
- Angular - Useful Resources
- Angular - Discussion
Angular - Dependency Injection
What is Dependency Injection?
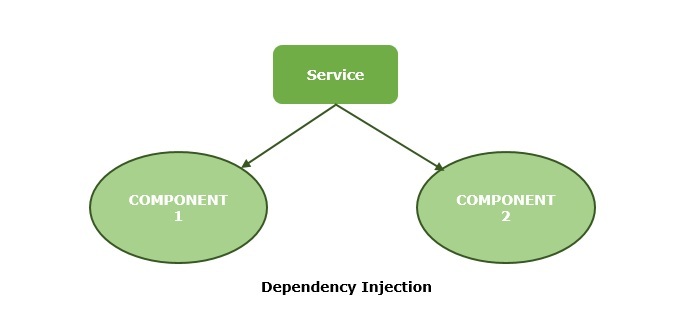
Dependency Injection (in short, DI) is a design pattern in which a class receives its dependencies from an external source instead of creating them itself. This approach helps applications achieve loose coupling and reduce tight coupling between different parts of the application. By injecting dependencies, applications become more flexible and adaptable to changes.
In Angular, dependency injection is used to inject services and other dependencies into components and other classes. Before understanding dependency injection in Angular, let's discuss its features and uses.
Features and Uses of Dependency Injection
Dependency injection is used because of the following reasons −
- DI decrease the tight coupling between classes and their dependencies.
- You create dependency once and reuse it according to the need in different parts of the application.
- DI helps in unit testing as configuration details are saved within configuration files and system can be reconfigured without recompiling.
- Using DI, lazy loading is implemented. Lazy loading is also a design pattern. In this design pattern, dependencies are created when they are required.
- With DI, the code become more testable, maintainable and reusable because the client classes do not need to know about the implementation process of dependencies.
Dependency Injection in Angular
In Angular, dependency injection is the feature of injecting services and values (like, strings and functions) into classes having Angular decorators. Angular uses providers to define how dependencies should be created, and injectors to manage the lifecycle of these dependencies. Services, components, directives, and pipes can all use DI to receive their dependencies.
How Dependency Injection Works in Angular?
In Angular, when you declare a dependency in the Component's class constructor, Angular looks up the service in its dependency graph and injects it into the component automatically. Let's see how dependency injection works step by step −
Service Creation: First, define a service using the @Injectable decorator. Inside this decorator use providedIn and give it a value root which will provide the service at the root level (means whole application).
Injecting the Service: In the component's constructor, declare the service as a parameter. Angular will inject the required instance of the service automatically.
Usage: Once injected, you can use the service in your component or other classes.
Scope of the Service: By default, services provided in the root are singleton, which means only one instance is shared across the application. However, services can also be provided at different levels if you want different instances for different parts of the application.
Implementing Dependency Injection in Angular
In this section, we will see how to implement dependency injection in an Angular application with the help of an example.
Example
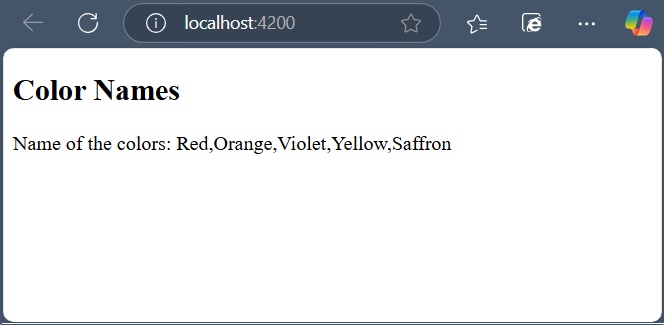
In the following example, we create an array of color names and then print it. The name of the colors will be printed using dependency injection.
Step 1: Create a service which is a class that holds the code to fetch data. This data will be shared across components within the application. Use the below command to create a service −
ng g s dataprovider
You can give any name of your choice.
Step 2: Open the service file and add the code given below −
import { Injectable } from '@angular/core'; @Injectable({ providedIn: 'root' }) export class DataproviderService { constructor() { } getData() { return ['Red', 'Orange', 'Violet', 'Yellow', 'Saffron']; } } Step 3: Once you have created a service, inject it into any component that needs it by including it in the constructor as shown below. We are injecting it inside app component.
import { Component } from '@angular/core'; import { RouterOutlet } from '@angular/router'; import { DataproviderService } from './dataprovider.service'; @Component({ selector: 'app-root', standalone: true, imports: [RouterOutlet], templateUrl: './app.component.html', styleUrl: './app.component.css' }) export class AppComponent { color: string[]; constructor(private colorService: DataproviderService) { this.color = this.colorService.getData(); } } Step 4: Now, add the following code inside template file.
<h2>Color Names</h2> <p>Name of the colors: {{color}} </p> <router-outlet /> Step 5: Run the application using ng serve command to get the output.