- Angular Tutorial
- Angular - Home
- Angular - Overview
- Angular - Features
- Angular - Advantages & Disadvantages
- Angular Basics
- Angular - Environment setup
- Angular - First Application
- Angular - MVC Architecture
- Angular Components
- Angular - Components
- Angular - Component Lifecycle
- Angular - View Encapsulation
- Angular - Component Interaction
- Angular - Component Styles
- Angular - Nested Components
- Angular - Content projection
- Angular - Dynamic components
- Angular - Elements
- Angular Templates
- Angular - Templates
- Angular - Template statements
- Angular - Template Variables
- Angular - SVG as Templates
- Angular Binding
- Angular - Data Binding
- Angular - Interpolation
- Angular - Event Binding
- Angular - Property Binding
- Angular - Attribute Binding
- Angular - Class Binding
- Angular - Style Binding
- Angular - Two-way Binding
- Angular Directives
- Angular - Directives
- Angular - Attribute Directives
- Angular - Structural Directives
- Angular - Custom Directives
- Angular Pipes
- Angular - Pipes
- Angular - Built-in Pipes
- Angular - Custom Pipes
- Angular Forms
- Angular - Forms
- Angular - Template Driven Forms
- Angular - Reactive Forms
- Angular - Form Validation
- Angular - Dynamic Forms
- Angular Dependency Injection
- Angular - Dependency Injection
- Angular - Injectable Service
- Angular Routing
- Angular - Routing
- Angular - Dynamic Routes
- Angular - Wildcard Routes
- Angular - Nested Routes
- Angular - Navigation
- Angular - Routing in SPA
- Angular - Custom Route Matches
- Angular - Router Reference
- Angular HTTP Client programming
- Angular - Services
- Angular - HTTP Client
- Angular - Request
- Angular - Response
- Angular - GET
- Angular - POST
- Angular - PUT
- Angular - DELETE
- Angular - JSONP
- Angular - CRUD Operations Using HTTP
- Angular Modules
- Angular - Introduction to Modules
- Angular - Root Module
- Angular - Feature Module
- Angular - Sharing Module
- Angular - Routing Module
- Angular - NgModules
- Angular Animation
- Angular - Animations
- Angular Service Workers & PWA
- Angular - Service Workers & PWA
- Angular Testing
- Angular - Testing Overview
- Angular Design Patterns
- Angular - Design Patterns
- Angular - Lazy Loading
- Angular - Singleton Pattern
- Angular - Observer Pattern
- Angular Libraries
- Angular - Libraries
- Angular - Angular Material
- Angular - PrimeNG
- Angular - RxJS
- Angular Advanced
- Angular - Signals
- Angular - Authentication & Authorization
- Angular - Internationalization
- Angular - Standalone Component
- Angular - Accessibility
- Angular - Web Workers
- Angular - Server Side Rendering
- Angular - Ivy Compiler
- Angular - Building with Bazel
- Angular - Backward Compatibility
- Angular - Reactive Programming
- Angular Tools
- Angular - CLI
- Angular Material UI Elements
- Angular - Paginator
- Angular - Datepicker
- Angular - Select Drop-down
- Angular Miscellaneous
- Angular - Third Party Controls
- Angular - Configuration
- Angular - Displaying Data
- Angular - Decorators & Metadata
- Angular - Basic Example
- Angular - Error Handling
- Angular - Testing & Building a Project
- Angular - Lifecycle Hooks
- Angular - User Input
- Angular - What's New?
- Angular Useful Resources
- Angular - Quick Guide
- Angular - Useful Resources
- Angular - Discussion
Angular - Component Lifecycle
Angular component goes through a series of stages/events during its existence. Before moving further in the journey of learning Angular, it is necessary to understand how a component interacts with the framework and the DOM throughout its existence.
When an angular component is constructed, it first goes through the change detection phase, where it checks whether there are any changes in the input and then acts accordingly. Then, the initialization phase kicks on and continues to other phases and finally gets destroyed in the destruction phase.
Component Lifecycle Phases in Angular
The different stages of the Angular Components Lifecycle are as follows −
Creation: It is the first phase where a component is instantiated.
Change Detection: Then, Angular try to detect changes in the View and Content of the application.
Rendering: After change detection, the new template is updated.
Destruction: The Component is destroyed at the end.
Component Lifecycle Hook in Angular
Each phase of the angular component is associated with a lifecycle hook interface which can be implemented to perform arbitrary action in that particular phase. Generally, the lifecycle hooks refer to the methods of lifecycle hook interfaces. Let's see the phases, their sequence and the corresponding hooks.
| Phases | Lifecycle Hooks | Description |
|---|---|---|
Creation | Constructor | Constructor runs when Angular instantiates the component for the first time. |
Change Detection | ngOnChanges() | Change detection is the first phase, where the angular component will check the inputs for changes and act accordingly. It has a corresponding lifecycle hook, ngOnChanges(). This hook runs before the ngOnInit() during the first initialization process. |
ngOnInit() | The ngOnInit() lifecycle hook runs exactly once after ngOnChanges(). It is raised to do the necessary initialization process based on the initial input. | |
ngDoCheck() | Next, Angular tries to detect the changes in the component and act accordingly. The lifecycle hook used for checking is ngDoCheck(). This hook is invoked even if there is not change in the input bound properties. Avoid defining this hook as it might affect the page's performance. | |
ngAfterContentInit() | This lifecycle hook is called only once after the initialization of all children nested inside the content of component. | |
ngAfterContentchecked() | It is invoked during every change detection phase after the children nested inside the component's content have been checked for changes. | |
ngAfterViewInit() | Next is the view initialization phase, where angular sets the various child views of the component template. The lifecycle hook used for view initialization phase is ngAfterViewInit(). | |
ngAfterViewchecked() | Now, Angular tries to detect the changes in the view of the component/directive. The lifecycle hook for view checking phase is ngAfterViewchecked(). | |
Rendering | afterNextRender() | It runs only once when all components have been rendered to the DOM. |
afterRender() | Runs every time after all components have been rendered to the DOM. | |
Destruction | ngOnDestroy() | In the final phase, ngOnDestroy() hook is called to destroy the component/directive. |
Execution Order of Component Lifecyle Hooks
Let us see the lifecycle sequence of an arbitrary component/directive through its hooks.
- ngOnChanges
- ngOnInit
- ngDoCheck
- ngAfterContentInit
- ngAfterContentChecked
- ngAfterViewInit
- ngAfterViewChecked
- ngOnChanges
- ngDocheck
- ngAfterContentChecked
- ngAfterViewchecked
- Repeation of Step 8 - 11 until destruction
- ngOnDestroy
Example
Let us create a new component, MyLifecycleComponent, wire up all hooks and check the sequence of the lifecylce using console output.
Step 1: Create a new component using angular CLI as shown below −
ng generate component my-lifecycle-sample
This will create a new component and its related template and styles as shown below.
$ ng generate component my-lifecycle-sample CREATE src/app/my-lifecycle-sample/my-lifecycle-sample.component.css (0 bytes) CREATE src/app/my-lifecycle-sample/my-lifecycle-sample.component.html (34 bytes) CREATE src/app/my-lifecycle-sample/my-lifecycle-sample.component.spec.ts (638 bytes) CREATE src/app/my-lifecycle-sample/my-lifecycle-sample.component.ts (252 bytes)
Step 2: Add all lifecycle hooks into the component and log messages:
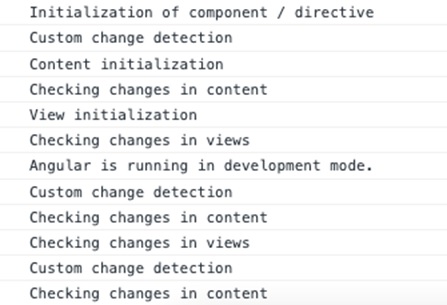
import { Component, OnChanges, OnInit, DoCheck, AfterContentInit, AfterContentChecked, AfterViewInit, AfterViewChecked, OnDestroy } from '@angular/core'; @Component({ selector: 'app-my-lifecycle-sample', templateUrl: './my-lifecycle-sample.component.html', styleUrls: ['./my-lifecycle-sample.component.css'] }) export class MyLifecycleSampleComponent implements OnChanges, OnInit { ngOnChanges() { console.log("Change detection") } ngOnInit() { console.log("Initialization of component / directive") } ngDoCheck() { console.log("Custom change detection") } ngAfterContentInit() { console.log("Content initialization") } ngAfterContentChecked() { console.log("Checking changes in content") } ngAfterViewInit() { console.log("View initialization") } ngAfterViewChecked() { console.log("Checking changes in views") } ngOnDestroy() { console.log("Destruction of component / directive") } } Step 3: Add the component in the app components template app.component.html.
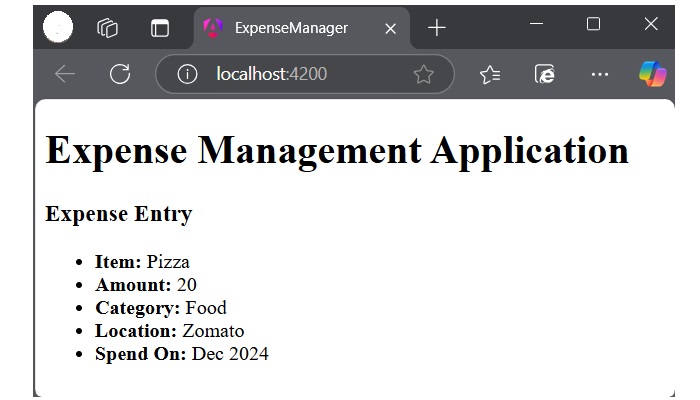
<app-my-lifecycle-sample> </app-my-lifecycle-sample> <router-outlet></router-outlet>
Run the application using ng serve and test the console through developer tool in the browser. It will show all the lifecycle events executing in the above discussed order.
Multiple Choice Questions on Angular Component Lifecycle
In this section, test your understanding of the angular component lifecycle by giving correct answers to the questions given below −
Q. 1 - What is the first lifecycle hook called when an Angular component is instantiated?
Answer : D
Explanation
The constructor runs when Angular instantiates the component for the first time. It is the very first phase before change detection and initialization.
Q. 2 - Which lifecycle hook is called after the component's content is initialized?
Answer : B
Explanation
The ngAfterContentInit() lifecycle hook is called only once after the initialization of all the children nested inside the content of the component.
Q. 3 - Which of the following is true about ngDoCheck()?
A - It is only invoked when there is a change in the input properties.
B - It runs after ngOnInit() and is used for custom change detection.
Answer : B
Explanation
ngDoCheck() is used for custom change detection and runs after ngOnInit(). It is called even if there are no changes to the input-bound properties.