
- Angular Tutorial
- Angular - Home
- Angular - Overview
- Angular - Features
- Angular - Advantages & Disadvantages
- Angular Basics
- Angular - Environment setup
- Angular - First Application
- Angular - MVC Architecture
- Angular Components
- Angular - Components
- Angular - Component Lifecycle
- Angular - View Encapsulation
- Angular - Component Interaction
- Angular - Component Styles
- Angular - Nested Components
- Angular - Content projection
- Angular - Dynamic components
- Angular - Elements
- Angular Templates
- Angular - Templates
- Angular - Template statements
- Angular - Template Variables
- Angular - SVG as Templates
- Angular Binding
- Angular - Data Binding
- Angular - Interpolation
- Angular - Event Binding
- Angular - Property Binding
- Angular - Attribute Binding
- Angular - Class Binding
- Angular - Style Binding
- Angular - Two-way Binding
- Angular Directives
- Angular - Directives
- Angular - Attribute Directives
- Angular - Structural Directives
- Angular - Custom Directives
- Angular Pipes
- Angular - Pipes
- Angular - Built-in Pipes
- Angular - Custom Pipes
- Angular Forms
- Angular - Forms
- Angular - Template Driven Forms
- Angular - Reactive Forms
- Angular - Form Validation
- Angular - Dynamic Forms
- Angular Dependency Injection
- Angular - Dependency Injection
- Angular - Injectable Service
- Angular Routing
- Angular - Routing
- Angular - Dynamic Routes
- Angular - Wildcard Routes
- Angular - Nested Routes
- Angular - Navigation
- Angular - Routing in SPA
- Angular - Custom Route Matches
- Angular - Router Reference
- Angular HTTP Client programming
- Angular - Services
- Angular - HTTP Client
- Angular - Request
- Angular - Response
- Angular - GET
- Angular - POST
- Angular - PUT
- Angular - DELETE
- Angular - JSONP
- Angular - CRUD Operations Using HTTP
- Angular Modules
- Angular - Introduction to Modules
- Angular - Root Module
- Angular - Feature Module
- Angular - Sharing Module
- Angular - Routing Module
- Angular - NgModules
- Angular Animation
- Angular - Animations
- Angular Service Workers & PWA
- Angular - Service Workers & PWA
- Angular Testing
- Angular - Testing Overview
- Angular Design Patterns
- Angular - Design Patterns
- Angular - Lazy Loading
- Angular - Singleton Pattern
- Angular - Observer Pattern
- Angular Libraries
- Angular - Libraries
- Angular - Angular Material
- Angular - PrimeNG
- Angular - RxJS
- Angular Advanced
- Angular - Signals
- Angular - Authentication & Authorization
- Angular - Internationalization
- Angular - Standalone Component
- Angular - Accessibility
- Angular - Web Workers
- Angular - Server Side Rendering
- Angular - Ivy Compiler
- Angular - Building with Bazel
- Angular - Backward Compatibility
- Angular - Reactive Programming
- Angular Tools
- Angular - CLI
- Angular Material UI Elements
- Angular - Paginator
- Angular - Datepicker
- Angular - Select Drop-down
- Angular Miscellaneous
- Angular - Third Party Controls
- Angular - Configuration
- Angular - Displaying Data
- Angular - Decorators & Metadata
- Angular - Basic Example
- Angular - Error Handling
- Angular - Testing & Building a Project
- Angular - Lifecycle Hooks
- Angular - User Input
- Angular - What's New?
- Angular Useful Resources
- Angular - Quick Guide
- Angular - Useful Resources
- Angular - Discussion
Angular - Lazy Loading
This chapter will discuss Lazy Loading in Angular, including its advantages, usage, and an example that implements lazy loading in your application from scratch to provide you with a better understanding.
Lazy Loading in Angular
In Angular, Lazy Loading is a design pattern developed by the google angular team to "enhance the application performance". The lazy-loading technique loads only the required components and module at a time rather than loading all together.
For example, suppose you have an Angular application with multiple feature modules, like a dashboard, user profile, settings, and reports. Instead of loading all these modules when the application starts, you can "configure lazy loading" to load these modules only when the user navigates to them.
Implementing Lazy Loading in Angular Project
To implement lazy loading in your project, follow the steps given below:
- Application Setup
- Create Feature Module with Routing
- Configure Routing
- Verify Lazy-loading
- forRoot() and forChild()
Application Setup
Follow the steps given below to create an angular application to implement the lazy-loading.
Step 1: Open the node.js command or code editor (e.g., VS code) and go to your favorite workspace as follows:
cd /favourite/workspace/ folder_name
Step 2:Install CLI using the following command:
npm install @angular/cli
Step 3: Use the command below to create a new angular application:
ng new myApp
Here,
- myApp is your application name.
Note: Once you hit the above command, it will ask you a few questions and reply with the "default answer".
Step 4: Go to your application directory as follows:
cd myApp
Step 5: Open the app.component.html file, remove everything, and update with the code below:
<h2>Welcome to Angular Lazy-loading Application</h2>
Step 6: Run the application to verify whether it was created correctly:
ng serve
Step 7: Open your friendly browser and navigate to URL localhost:4200 to verify the application has been created successfully.
Create Feature Module with Routing
In Angular, a feature module is a "special module" that organizes reliable blocks of functionality, such as components, directives, services, and pipes, along with their separate routing configurations.
This modularity helps in lazy loading, "improving application performance" by loading feature "modules only when needed".
Step 1: Create a feature module, auth as follows:
ng generate module auth --routing
Here, the --routing flag enables "individual routing" for the Auth module. Once the above command is executed successfully, you will see two files within the auth folder:
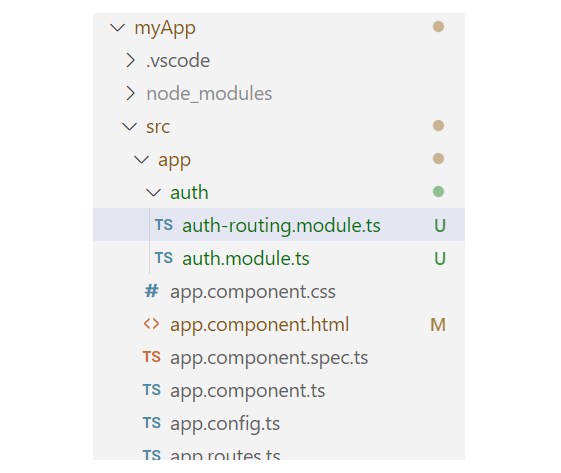
Step 2: Create a component, login within the Auth module as:
ng generate component login
Create another Feature Module with Routing
Let's create one more feature module, Dashboard, to observe the changes when we load different modules.
Step 1: Create another feature module, dashboard as follows:
ng generate module dashboard --routing
Step 2: Create a component, home within the dashboard module:
ng generate component login
Handling UI
To make it more understandable, let's add some UI for different components that belong to individual feature modules.
Step 1: Open the app.component.html file and place the code below:
<h2>Welcome to Angular Lazy-loading Application</h2> <a routerLink="/auth">Login</a> <a routerLink="/dashboard">Home</a> <hr> <router-outlet></router-outlet>
Step 2: Open the app.component.css file and place the code below:
a{ text-decoration: none; margin: 0px 10px; background-color: green; color: white; border-radius: 10px; padding: 10px 20px; font-family: sans-serif; } Configure Routing
Enable lazy loading in Angular, you need to configure routing for both individual components within the feature module and the root routing for the feature modules.
To lazy load Angular modules, use the loadChildren property (instead of component) in your AppRoutingModule (e.g., app.routes.ts file) routes configuration as follows:
Step 1: Open the app.routes.ts file and define the routes for both the feature modules:
import { Routes } from '@angular/router'; export const routes: Routes = [ {path: 'auth', loadChildren:() => import('./auth/auth.module').then(m => m.AuthModule)}, {path: 'dashboard', loadChildren:() => import('./dashboard/dashboard.module').then(m => m.DashboardModule) } ]; Here, the loadChildren property is a router configuration option that allows you to lazily load a module.
Step 2: Define the routes for the LoginComponent within the AuthModule as follows:
import { NgModule } from '@angular/core'; import { RouterModule, Routes } from '@angular/router'; import { LoginComponent } from './login/login.component'; const routes: Routes = [ {path: '', component: LoginComponent} ]; @NgModule({ imports: [RouterModule.forChild(routes)], exports: [RouterModule] }) export class AuthRoutingModule { } Step 3: Define the routes for the HomeComponent within the DashboardModule as follows:
import { NgModule } from '@angular/core'; import { RouterModule, Routes } from '@angular/router'; import { HomeComponent } from './home/home.component'; const routes: Routes = [ {path: '', component: HomeComponent} ]; @NgModule({ imports: [RouterModule.forChild(routes)], exports: [RouterModule] }) export class DashboardRoutingModule { } Step 4: Run the application using the following command:
ng serve
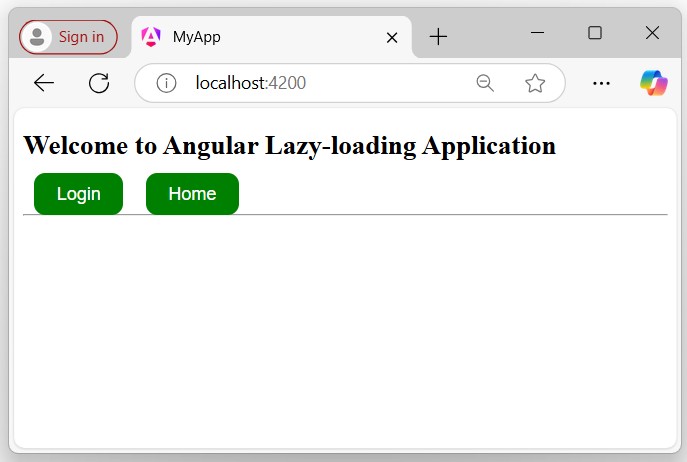
Step 5: Open your friendly browser and navigate to the URL localhost:4200 to get the first look of your application:
Verify Lazy-loading
To verify lazy loading, you need to follow a few steps in your browser where your application is currently running:
Step 1: Inspect (right-click on your page and click on inspect) the browser page where your application is running and navigate to the Network tab as follows:
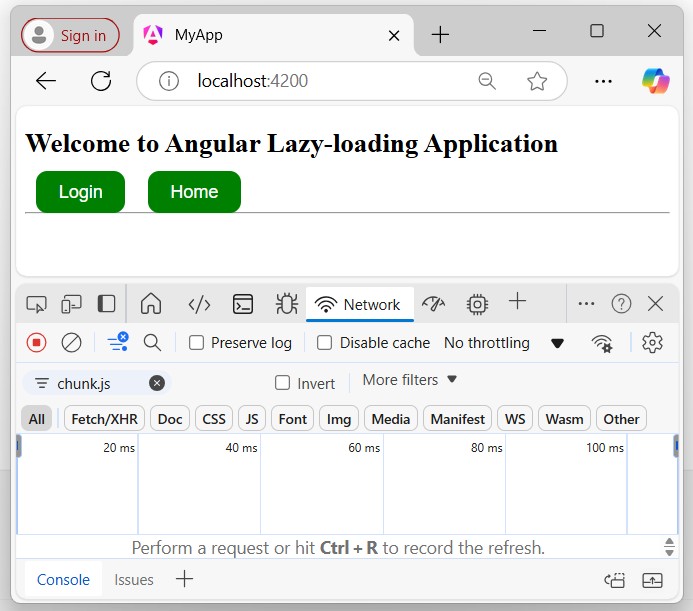
Click on the Login or Home button. If you see a chunk (chunk.js) appear, everything is wired up properly, and the feature module is lazy-loaded. A chunk should appear for "Login" and "Home", but only once for each.
Step 2: Click the login button and recognize the changes:
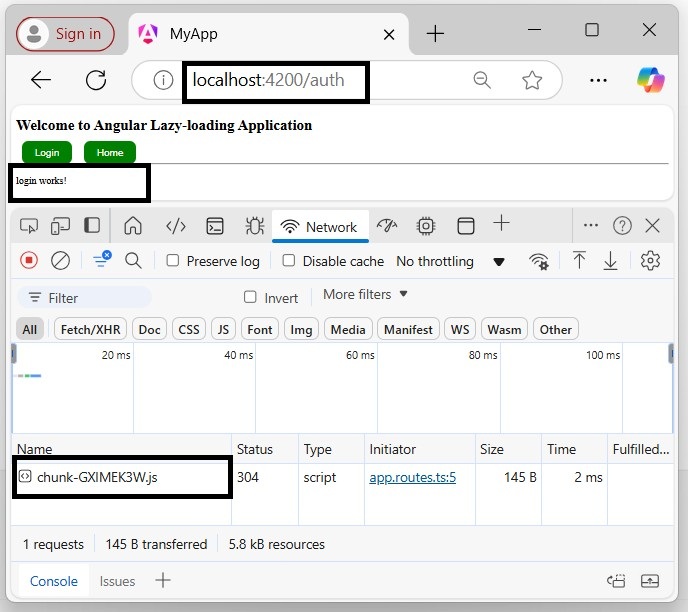
To see it again or to test after making changes, click the circle with a line through it in the upper left of the Network Tab:
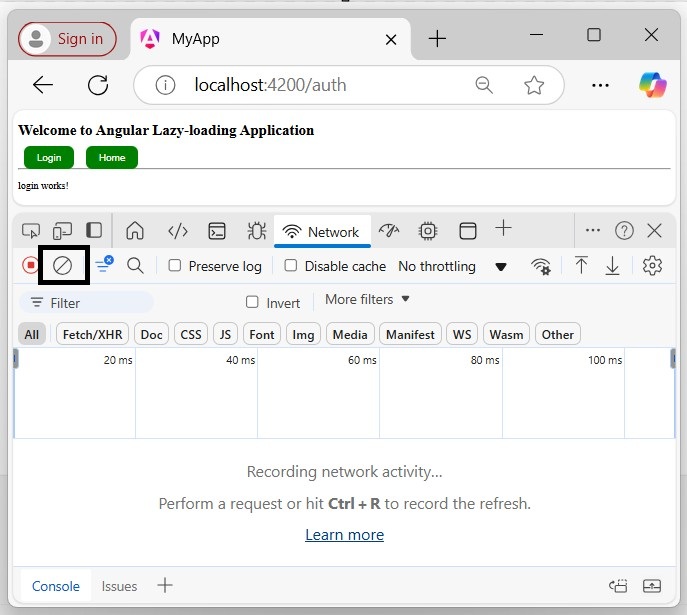
Then reload with "Cmd+r" or "Ctrl+r", depending on your platform.
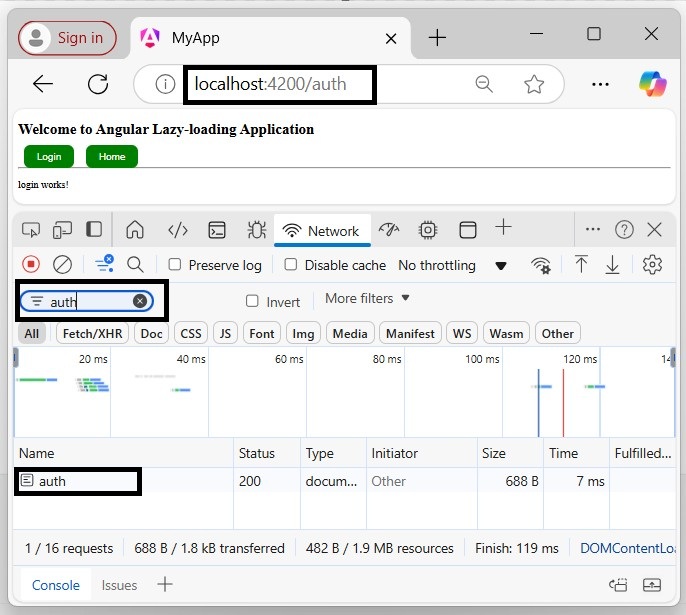
If you try to filter the module, only the current loaded module will appear in the network section:
forRoot() and forChild()
The forRoot() function is not available in standalone applications. Because, instead of creating an app-routing.module.ts file, the standalone applications generate an app.routes.ts file, which does not require forRoot() function.
The forRoot() function specifies that this is the root routing module. It configures all the routes you pass to it, provides access to the router directives, and registers the Router service. Use forRoot() "only once" in your application within the AppRoutingModule.
The Angular CLI also adds RouterModule.forChild(routes) to your feature routing modules. This way, Angular knows that the route list is only responsible for providing extra routes and is intended for feature modules. You can use forChild() in "multiple" modules.
Advantages of Lazy Loading
Here is a list of advantages of lazy loading:
- Enhances Application Performance by loading only required data.
- Increases Modularity
- Decreases Redundancy
- Improves User Experience
- Reduces Server Load