This page applies to Apigee and Apigee hybrid.
View Apigee Edge documentation.
![]()
What you'll learn
In this tutorial, you'll learn to:
- Create an Apigee API proxy from an OpenAPI Specification.
- Call the API proxy using cURL.
- Add a policy to a conditional flow.
- Test the policy invocation using cURL.
You'll learn how to create an Apigee API proxy from an OpenAPI Specification using the Apigee UI. When you call the API proxy with an HTTP client, such as cURL, the API proxy sends the request to the Apigee mock target service.
About the Open API Initiative
"The Open API Initiative (OAI) is focused on creating, evolving and promoting a vendor neutral API Description Format based on the Swagger Specification." For more information about the Open API Initiative, see The OpenAPI Specification.
An OpenAPI Specification uses a standard format to describe a RESTful API. Written in either JSON or YAML format, an OpenAPI Specification is machine readable, but is also easy for humans to read and understand. The specification describes such elements of an API as its base path, paths and verbs, headers, query parameters, operations, content types, response descriptions, and more. In addition, an OpenAPI Specification is commonly used to generate API documentation.
About the Apigee mock target service
The Apigee mock target service used in this tutorial is hosted at Apigee and returns simple data. It requires no API key or access token. In fact, you can access it in a web browser. Try it out by clicking the following:
The target service returns the greeting Hello, guest!
For information about the full set of APIs the mock target service supports, see Apigee Sample APIs
What you'll need
- Before you begin, you must complete the steps inOverview and prerequisites.
- An OpenAPI Specification. In this tutorial, you'll use the
mocktarget.yamlOpenAPI Specification which describes Apigee's mock target service,http://mocktarget.apigee.net. For more information, see apigee/api-platform-samples. - cURL installed on your machine to make API calls from the command line; or a web browser.
Create the API proxy
To create the API proxy from an OpenAPI Specification:
If you are using the Apigee UI in Cloud console: Select Proxy development > API Proxies.
If you are using the classic Apigee UI: Select Develop > API Proxies and in the Proxies pane, select the environment for the proxy.
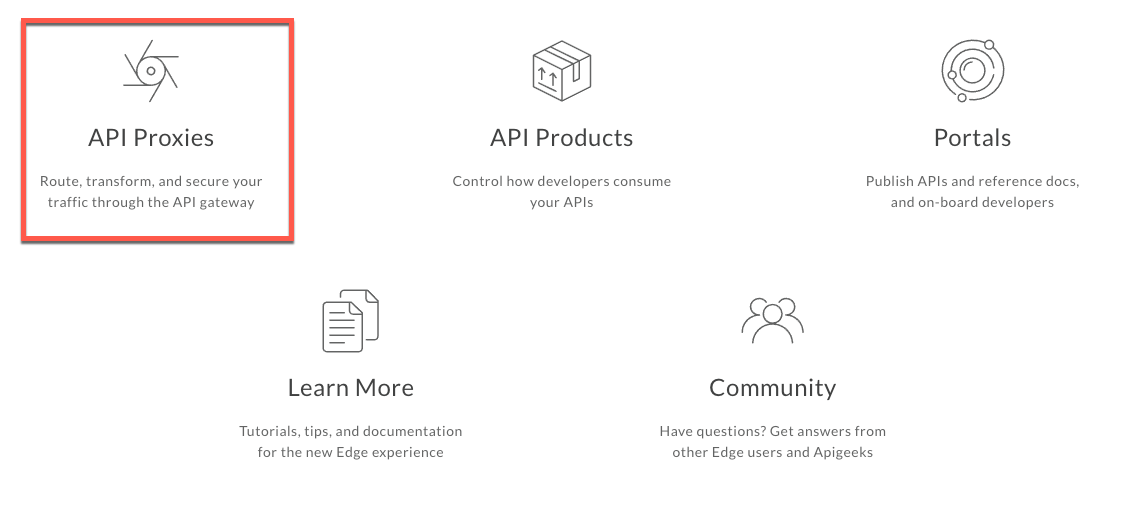
- Click API Proxies in the main window.
Alternatively, you can select Develop > API Proxies in the left navigation bar.
Click Create New.

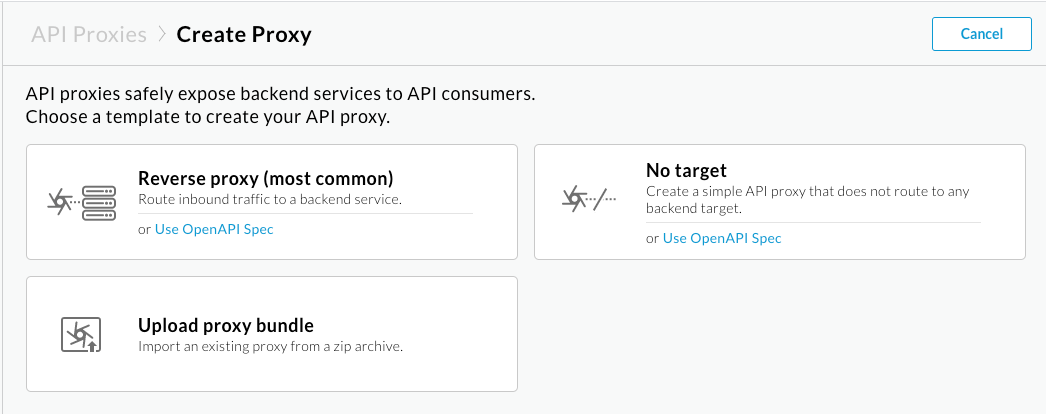
In the Create Proxy wizard, click Use OpenAPI Spec for the Reverse proxy (most common) template.
- Click URL and enter the following information:
OpenAPI Spec URL: Path to the raw content on GitHub for the OpenAPI Specification in the URL field:
https://raw.githubusercontent.com/apigee/api-platform-samples/master/default-proxies/helloworld/openapi/mocktarget3.0.yaml
- Click Select.
The Proxy details page in the Create Proxy wizard displays. The fields are pre-populated using values defined in the OpenAPI Specification as shown in the following figure:

The following table describes the default values that are pre-populated using the OpenAPI Specification:
Field Description Default Name Name of the API proxy. For example: Mock-Target-API.titleproperty from the OpenAPI Specification with spaces replaced by dashesBase path Path component that uniquely identifies this API proxy within the organization. The public-facing URL of this API proxy is comprised of your external or internal domain name and this base path. For example: http://apitest.acme.com/mock-target-apiName field content converted to all lower case Description Description of the API proxy. descriptionproperty from the OpenAPI SpecificationTarget (Existing API) Target URL invoked on behalf of this API proxy. Any URL that is accessible over the open Internet can be used. For example: http://mocktarget.apigee.netserversproperty from the OpenAPI SpecificationThe following provides an excerpt from the OpenAPI Specification showing the properties that are used to pre-populate the fields.
openapi: 3.0.0 info: description: OpenAPI Specification for the Apigee mock target service endpoint. version: 1.0.0 title: Mock Target API paths: /: get: summary: View personalized greeting operationId: View a personalized greeting description: View a personalized greeting for the specified or guest user. parameters: - name: user in: query description: Your user name. required: false schema: type: string responses: "200": description: Success ... servers: - url: http://mocktarget.apigee.net - url: https://mocktarget.apigee.net ...
- In the Proxy details page, edit the Description field as follows:
API proxy for the Apigee mock target service endpoint.
- Click Next.
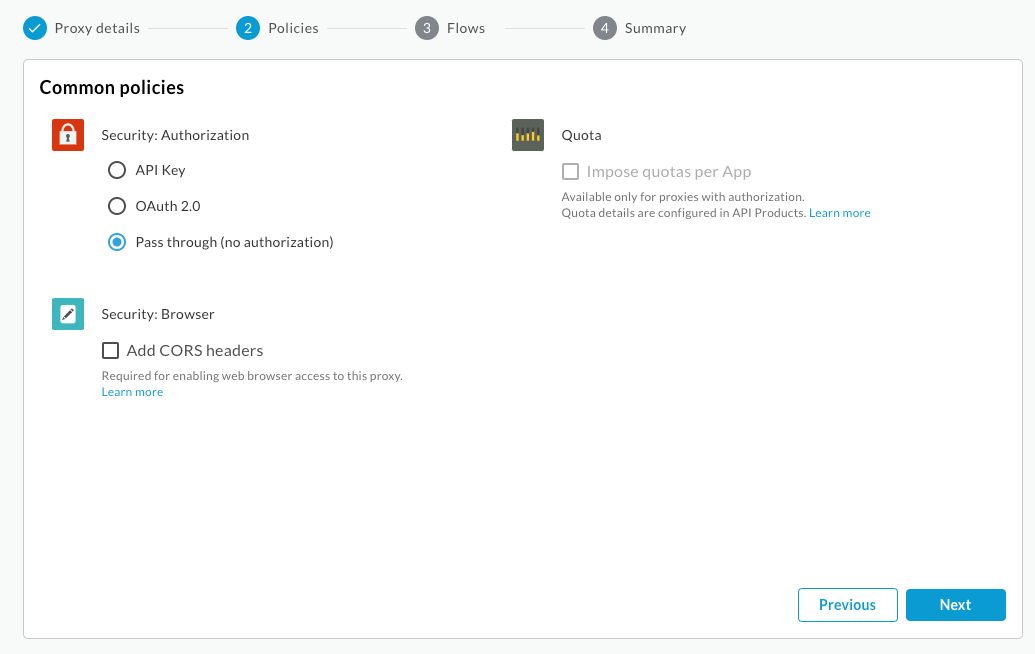
- On the Common policies page, under Security: Authorization ensure that Pass through (no authorization) is selected, and click Next:
- On the Flows page, make sure all operations are selected.
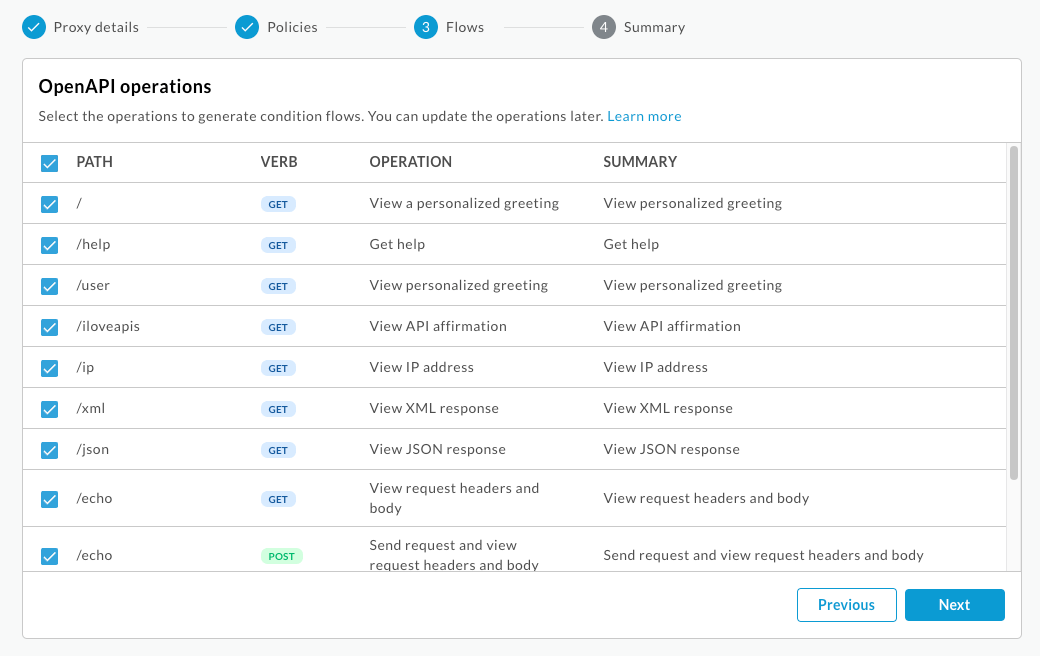
- Click Next.
- On the Summary page, make sure an environment is selected under Optional Deployment and click Create and deploy:

Apigee creates your new API proxy and deploys it to your environment:
- Click Edit proxy to display the Overview page for the API proxy.
Test the API proxy
You can test your Mock-Target-API API using cURL or a web browser.
curl -v YOUR_ENV_GROUP_HOSTNAME/myproxy
where YOUR_ENV_GROUP_HOSTNAME is your environment group hostname. See Find your environment group hostname.
For example:
curl -v -k https://apitest.acme.com/myproxy
Response
You should see the following response:
Hello, Guest!
Add an XML to JSON policy
Next, you'll add the XML to JSON policy to the View XML Response conditional flow that was generated automatically when you created the API proxy from the OpenAPI Specification. The policy will convert the target's XML response to a JSON response.
First, call the API so that you can compare the results with those received after you add the policy. In a terminal window execute the following cURL command. You're calling the target service's /xml resource, which natively returns a simple block of XML.
curl -v https://YOUR_ENV_GROUP_HOSTNAME/mock-target-api/xml
where YOUR ENV_GROUP_HOSTNAME is the environment group hostname. See Find the environment group hostname.
Response
You should see the following response:
<root> <city>San Jose</city> <firstName>John</firstName> <lastName>Doe</lastName> <state>CA</state> </root>
Now let's do something that converts the XML response to JSON. Add the XML to JSON policy to the View XML Response conditional flow in the API proxy.
New Proxy Editor
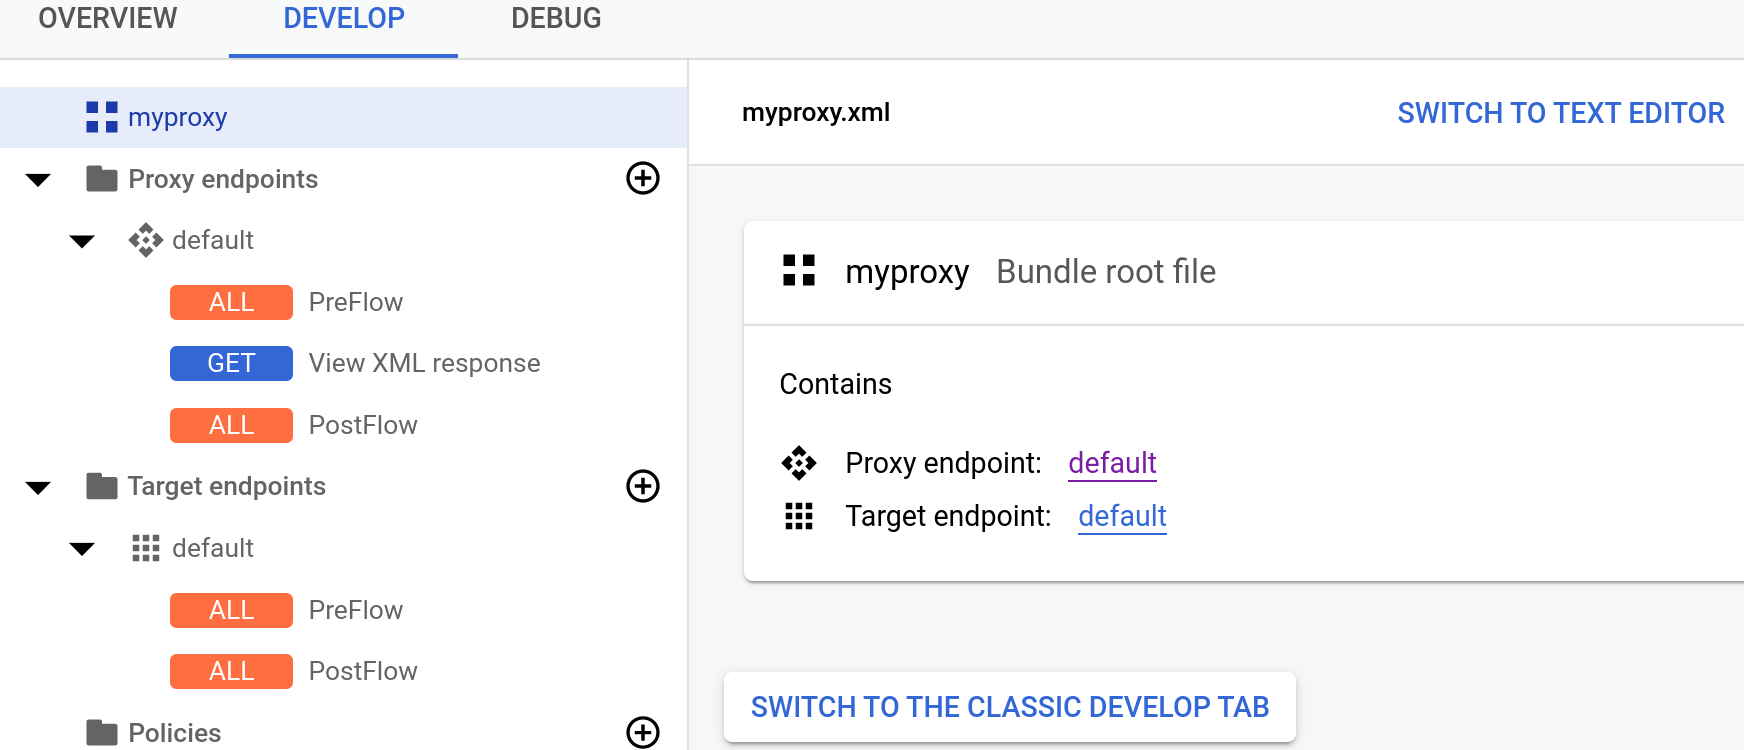
Click the Develop tab in the Mock-Target-API Overview page in the Apigee UI.
- In the left-hand pane, under Proxy Endpoints > default, click the View XML Response conditional flow.
- In the left-hand pane, click the + button in the Policies row.
In the Create policy dialog, click in the Select policy type field, scroll down to Mediation, and select XMLToJSON. Keep the default values for Display Name and Name.
- Click Create to create the policy.
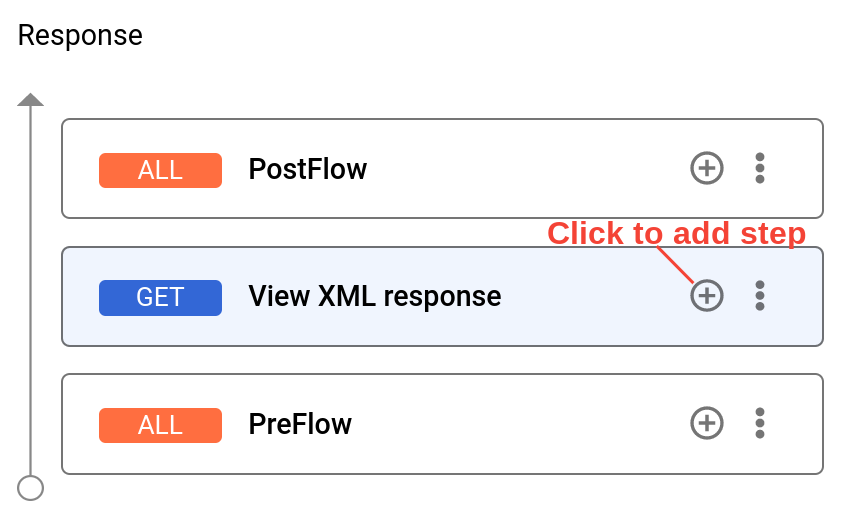
Click the + button next to the View XML response flow in the Response.
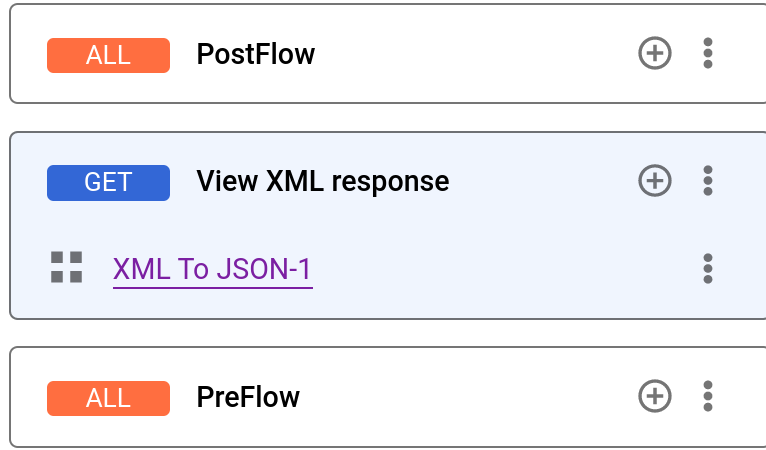
- In the Add Policy Step dialog, click in the Select existing policy field and select XML to JSON-1.
Click Add. The XML to JSON policy is applied to the response.
To view the code for the View XML Response conditional flow, click Switch To Code Editor.
- Click Save.
Classic Proxy Editor
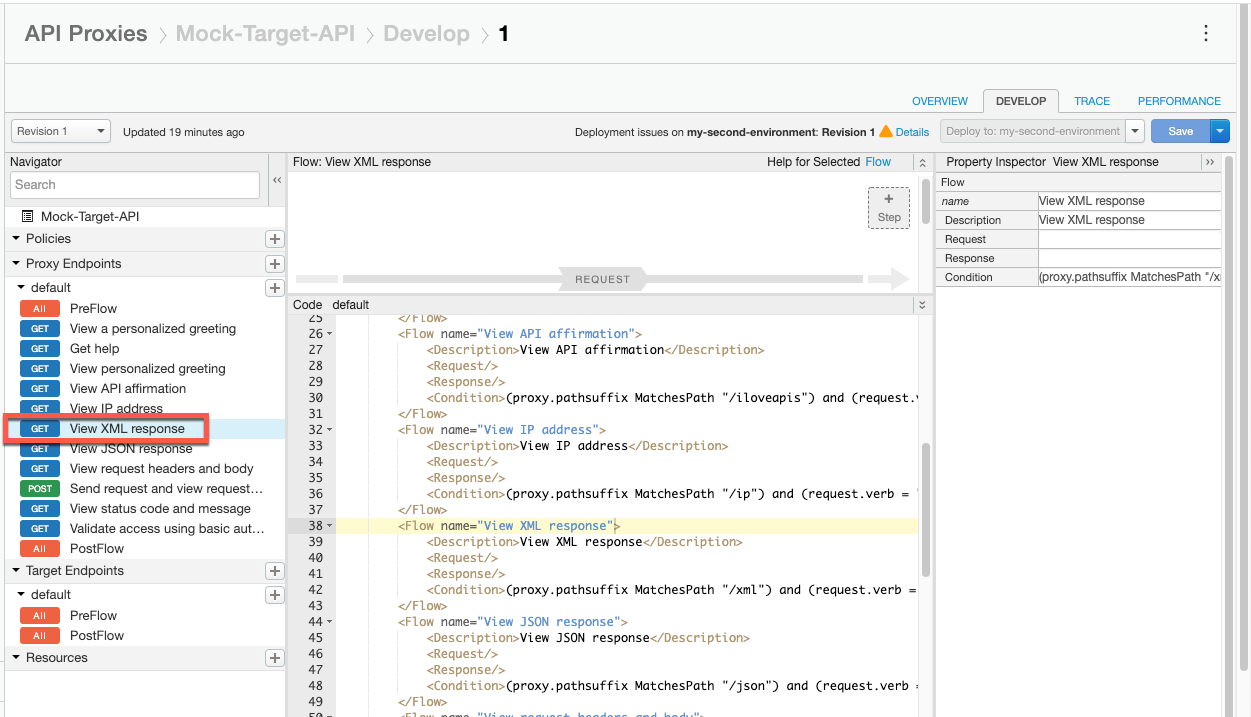
Click the Develop tab in the Mock-Target-API Overview page in the Apigee UI.

In the left Navigator pane, under Proxy Endpoints > default, click the View XML Response conditional flow.
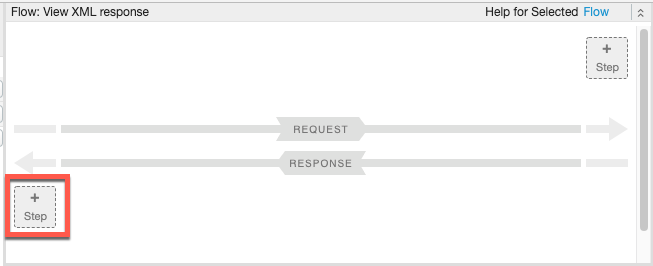
Click the bottom +Step button, corresponding to the Response for the flow.
The Add Step dialog opens to display a categorized list of all the policies that you can add.
Scroll to the Mediation category and select XML to JSON.
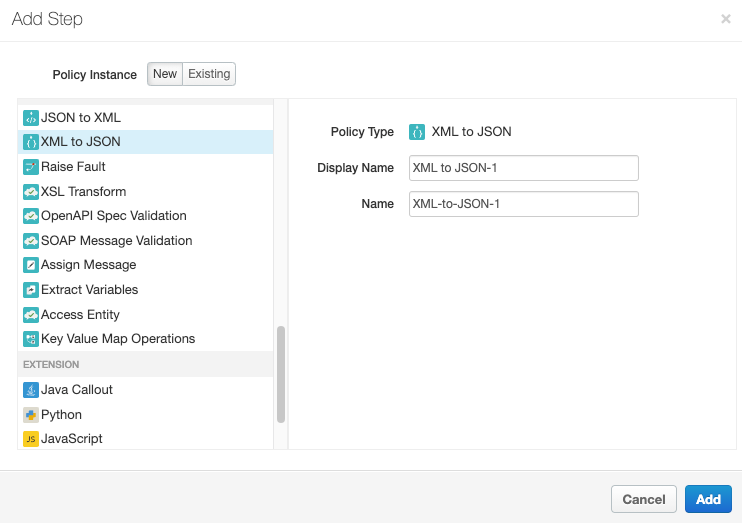
- Keep the default values for Display Name and Name.
Click Add. The XML to JSON policy is applied to the response.
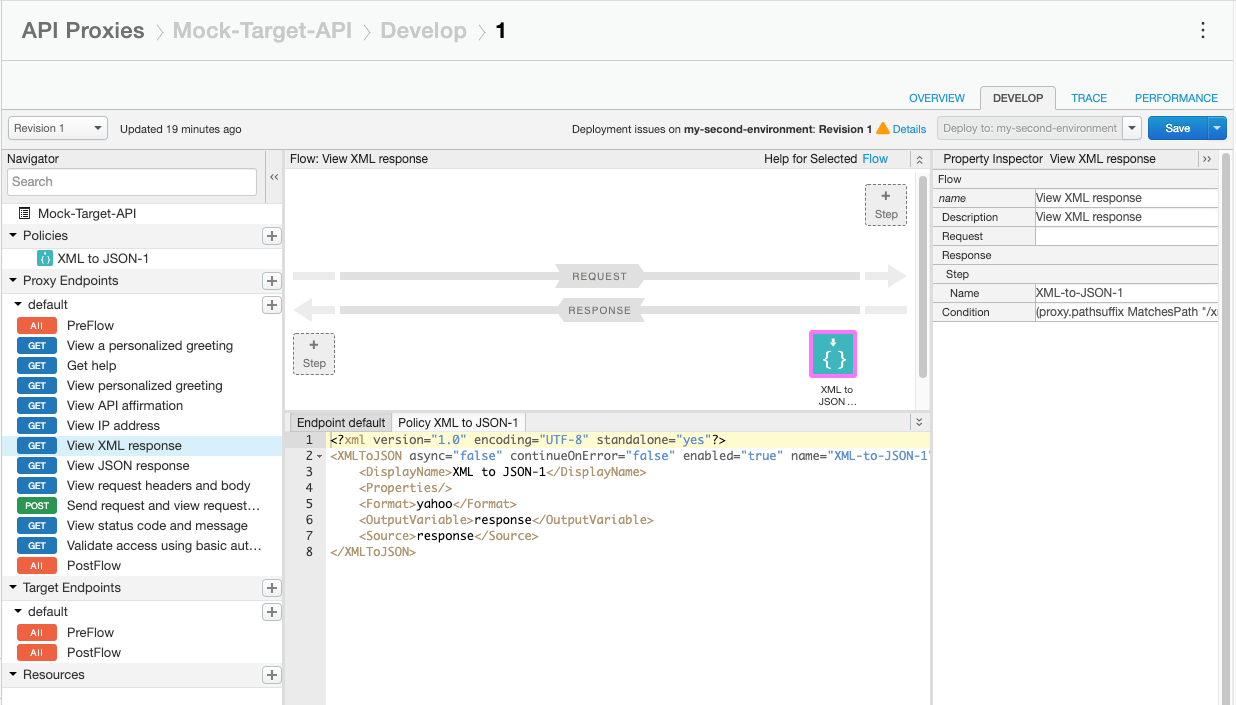
- Click Save.
Now that you've added the policy, call the API again using cURL. Notice that you're still calling the same /xml resource. The target service still returns its block of XML, but now the policy in the API proxy will convert the response to JSON. Make this call:
curl -v https://YOUR_ENV_GROUP_HOSTNAME/mock-target-api/xml
where YOUR ENV_GROUP_HOSTNAME is the environment group hostname. See Find the environment group hostname.
Note that the XML response is converted to JSON:
{"root":{"city":"San Jose","firstName":"John","lastName":"Doe","state":"CA"}}Except as otherwise noted, the content of this page is licensed under the Creative Commons Attribution 4.0 License, and code samples are licensed under the Apache 2.0 License. For details, see the Google Developers Site Policies. Java is a registered trademark of Oracle and/or its affiliates.
Last updated 2025-04-24 UTC.