This page applies to Apigee and Apigee hybrid.
View Apigee Edge documentation.
Adding policy-based capabilities to an API proxy is a two-step process:
- Configure an instance of a policy type.
- Attach the policy instance to a Flow.
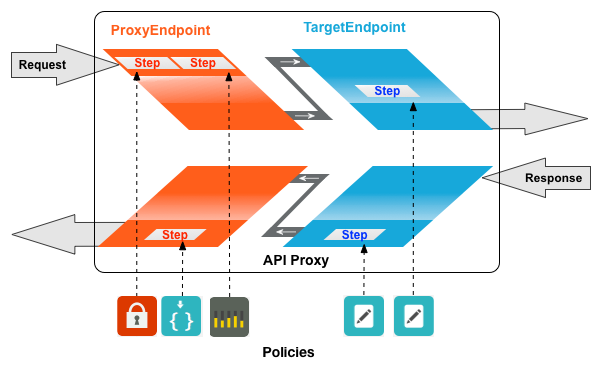
The diagram below shows the relationship between policies and flows. As you can see, a policy is attached to a flow as a processing step. To configure the desired behavior for your API, you need to understand a little bit about flows. (This topic was covered earlier in Configuring flows.)
One type of policy that is commonly used is the SpikeArrest policy. SpikeArrest prevents sudden increases in message traffic that might swamp your backend services.
Attaching a policy to a flow
New Proxy Editor
To attach a policy to a flow:
- Select an API proxy and navigate to the Develop view.
- In the left-hand pane, click the + button in the Policies row.
In the Create policy dialog, click in the Select policy type field and scroll down to Traffic Management and select SpikeArrest.
Optionally, you can change the Display name and Name of the policy.
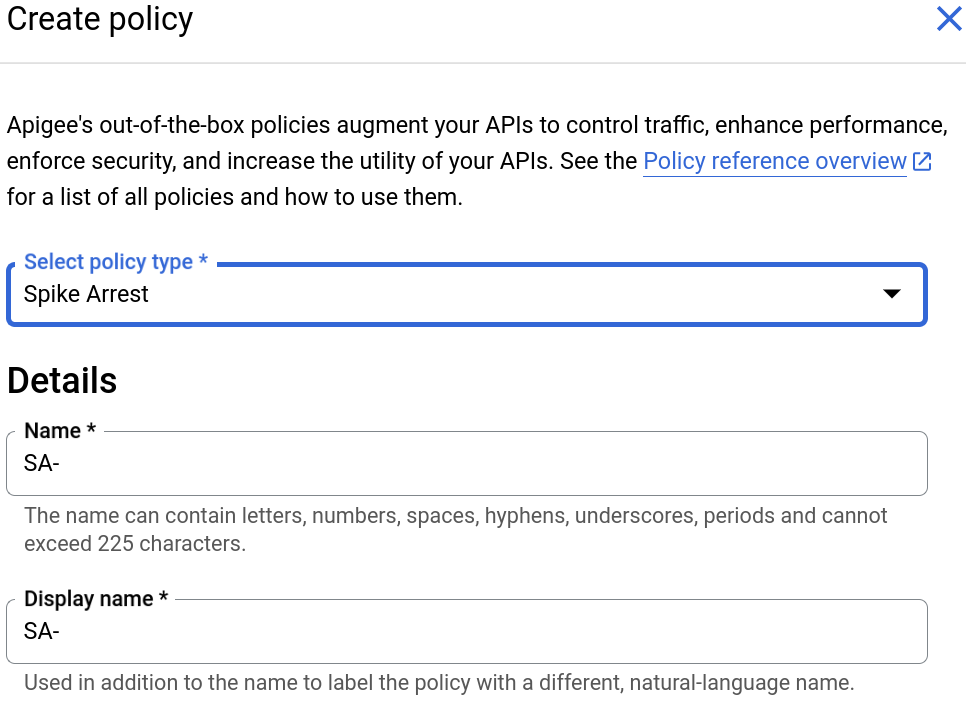
When you are done, click Create to create the policy.
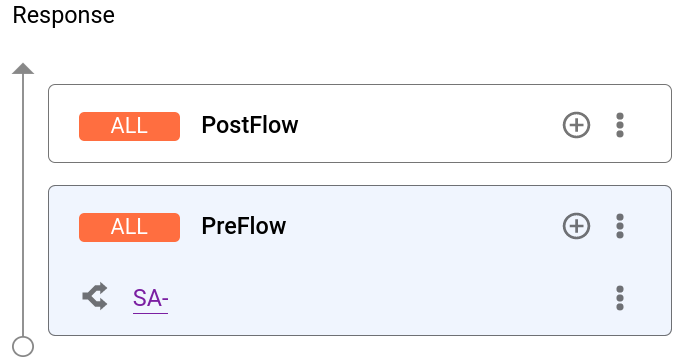
- Now that you have created the Spike Arrest policy, you can attach it to a step in the PreFlow. To do so, select Proxy Endpoints > default > PreFlow in the left-hand pane:

- Click the + button next to PreFlow in the Response pane at the bottom-right of the Visual Editor:

- In the Add policy step dialog, select the Spike Arrest policy.
Click Add to attach the policy.
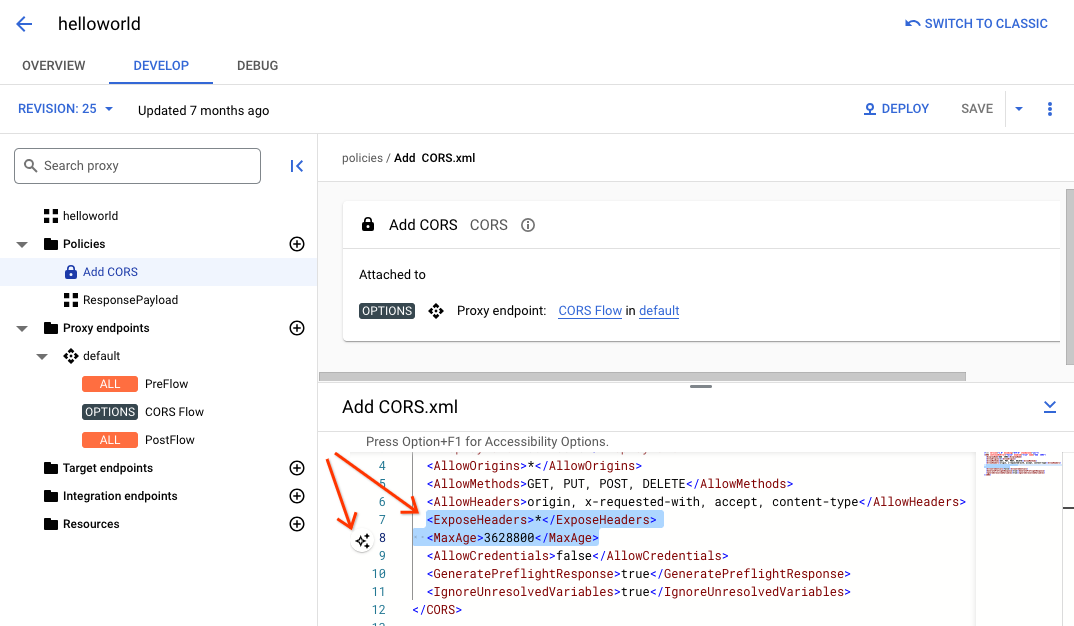
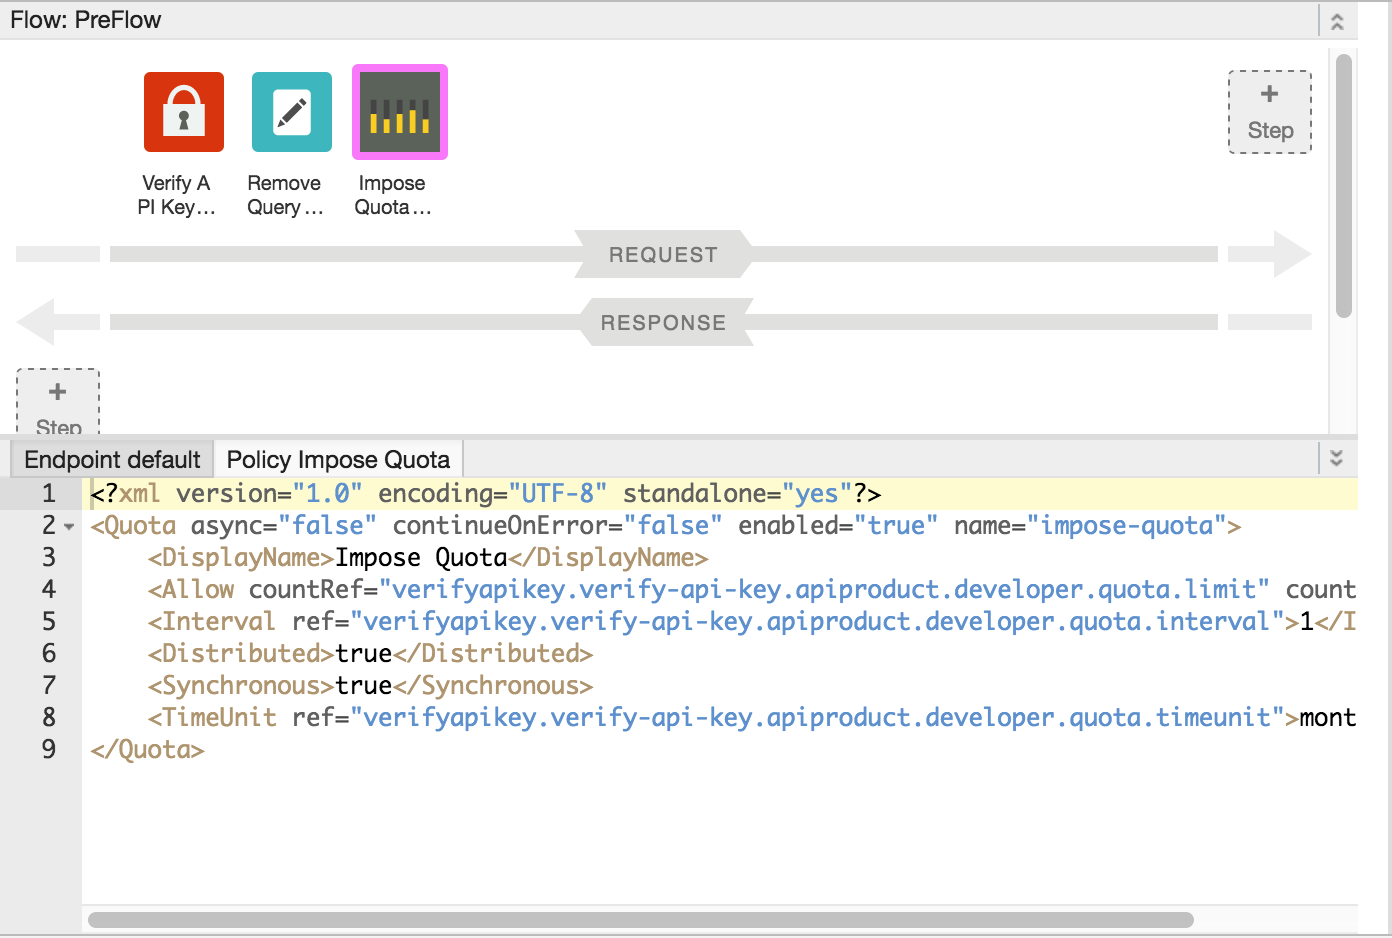
The Spike Arrest policy is now displayed in the Response pane:
The following XML code for the proxy is displayed in the text editor:
<ProxyEndpointname="default"> <PreFlowname="PreFlow"> <Request/> <Response> <Step>< <Name>SA-</Name> </Step> </Response> </PreFlow> <Flows/> <PostFlowname="PostFlow"> <Request/> <Response/> </PostFlow> <HTTPProxyConnection> <BasePath>/myproxy</BasePath> </HTTPProxyConnection> <RouteRulename="default"> <TargetEndpoint>default</TargetEndpoint> </RouteRule> </ProxyEndpoint>
Detachingpoliciesfromaflow
Todetachapolicyfromaflow,clickthethree-dotmenunexttotheflowandselectDeletepolicystep
ClassicProxyEditor
Toattachapolicytoaflow:
- SelectanAPIproxyandnavigatetotheDevelopview.
- IntheAPIProxyEditor,selecttheflowtowhichyouwanttoattachapolicyintheNavigatorpane.
Forexample,thePreFlowflowisselectedforthedefaultAPIproxyendpointinthefollowingfigure: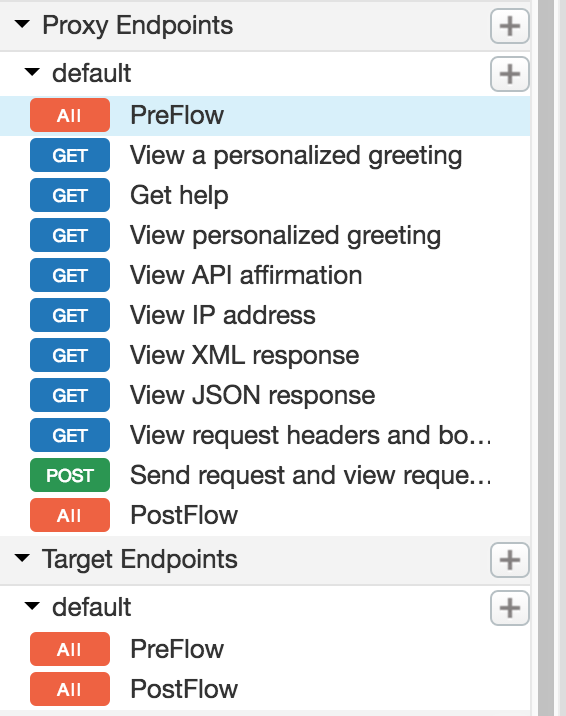
- IntheDesignview,click+Stepassociatedwiththerequestorresponseflowtoattachapolicy.Forexample:

TheAddStepdialogopensdisplayingacategorizedlistofpolicies.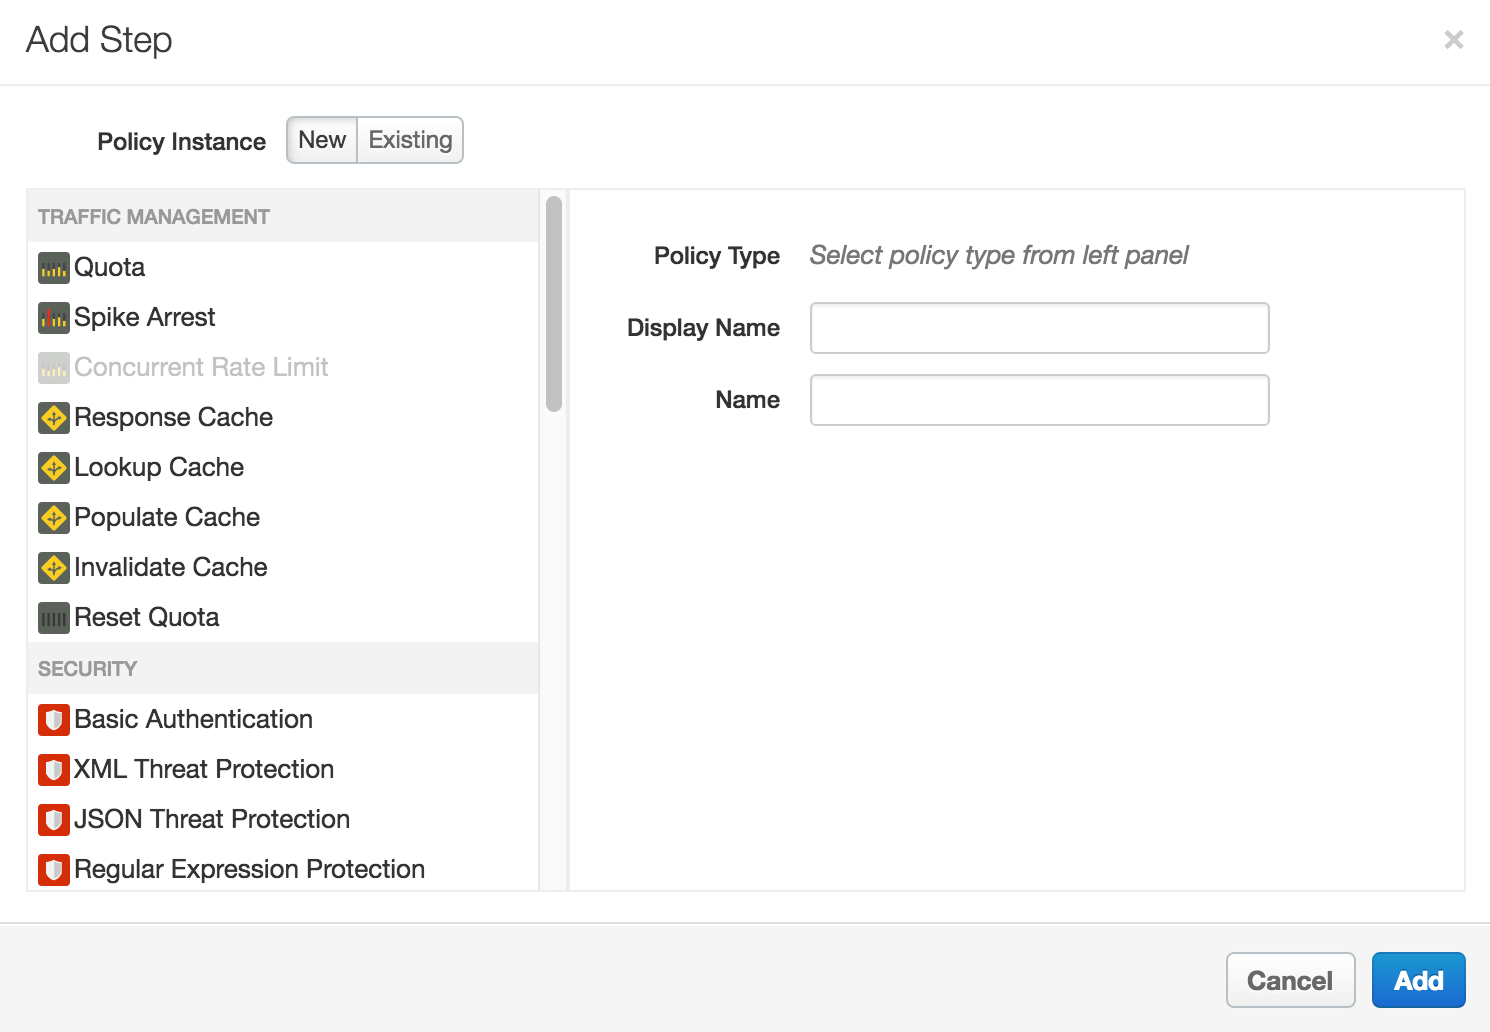
- Scrollandselectthepolicytypethatyouwanttoattachtotheselectedflow.
- Modifythefollowingfields.
DisplayName:Uniquedisplaynameforthepolicy.TheUIwillgenerateadefaultname,butitisadvisabletocreateadescriptivenameforthepolicy.Thiswillensurethatotherdevelopersinyourorganizationhaveaneasytimeunderstandingwhatthepolicyisintendedtodo.
Name:Uniquenameforthepolicy.Thepolicynamematchesthedisplaynamewiththefollowingexceptions:
Spacesarereplacedbydashes.
Consecutivedashesarereplacedbyasingledash.
Exceptfordashes,underscores,andspaces(whicharereplaced,asnotedabove),charactersthatarenotalphanumeric,suchaspoundsigns,percentsigns,ampersands,andsoon,areremoved.
- ClickAdd.
Thepolicyisattachedtotheselectedflow.
Afterthepolicyisattached,you’llseethepolicydisplayedintheDesignerviewfortheflow,inthisexamplethePreFlowofthedefaultproxyendpoint,andinthePolicieslistintheNavigationpane.TheCodeview,whichdisplaystheXMLforthenewlyattachedpolicy,displaysbelowtheDesignerview.Apigeegeneratesaninstanceofthepolicythatcontainsasetofreasonabledefaultvalues.
Addingapolicywithoutattachingittoaflow
Toaddapolicywithoutattachingittoaflow,whichisusefulforHandlingfaults,click+inthePoliciesbarintheNavigatorviewtoopentheAddPolicydialogandaddthepolicy(asdescribedinsteps4through6intheprevioussection).
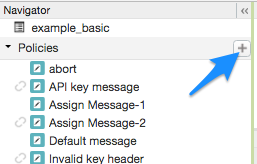
ApolicythatisnotattachedtoanyflowisflaggedwiththedetachediconinthePolicieslist,asshownadjacenttotheAPIkeymessagepolicyshowninthepreviousfigure.
Afteryoucreatethepolicy,youcanattachittoaflowbydragginganddroppingitfromthePolicieslisttothedesiredflowintheDesignerview.
Detachingpoliciesfromaflow
TodetachapolicyfromaFlow,selecttheFlow.MouseovertheiconforthepolicyintheDesignerviewoftheFlow.ClicktheXinthecirclethatappearsintheicon.
Deletingapolicyinstance
Todeleteapolicyinstance,mouseovertheentryforthepolicyintheNavigatorview.ClicktheXinthecirclethatappearstotherightoftheentry.
ConfiguringpoliciesintheUI
WhentheUIgeneratesapolicyinstance,itappliesreasonabledefaultvaluesforcommonsettings.Youmayneedtomodifythesesettingstomeetyourrequirements.
Forexample:<?xmlversion="1.0"encoding="UTF-8"standalone="yes"?> <SpikeArrestasync="false"continueOnError="false"enabled="true"name="spikearrest-1"> <DisplayName>SpikeArrest-1</DisplayName> <FaultRules/> <Properties/> <Identifierref="request.header.some-header-name"/> <MessageWeightref="request.header.weight"/> <Rate>30ps</Rate> </SpikeArrest>
You can configure a policy by directly editing its XML configuration in the Code view. For example, the peak message rate for the Spike Arrest policy is initially set to 30 messages per second. You can change the peak rate by changing the <Rate> element value in the XML for the policy. For further details about configuring policies, see the Policy reference.
You can also cut-and-paste policies into the Code view. This is a great way to re-use policies from the samples available on GitHub.
When you make changes to a policy definition in the Code view, the changes are reflected in the Property Inspector. The reverse is also true — make changes in the Property Inspector and they appear in the XML in the Code view.
For documentation specific to the Quota policy used in this topic, see Quota policy.
Use Gemini Code Assist code explain with policies
If you have Gemini Code Assist, you can use it to understand policies and policy elements directly in the Apigee UI in Cloud console:
- While editing the policy in the Code view, highlight part of the policy code, such as an XML element or attribute. You can also highlight multiple elements.
- Click the Gemini Code Assist icon as shown below. The side panel shows information on the policy and the element you highlighted.