You are viewing documentation for Kubernetes version: v1.29
Kubernetes v1.29 documentation is no longer actively maintained. The version you are currently viewing is a static snapshot. For up-to-date information, see the latest version.
Example: Deploying WordPress and MySQL with Persistent Volumes
This tutorial shows you how to deploy a WordPress site and a MySQL database using Minikube. Both applications use PersistentVolumes and PersistentVolumeClaims to store data.
A PersistentVolume (PV) is a piece of storage in the cluster that has been manually provisioned by an administrator, or dynamically provisioned by Kubernetes using a StorageClass. A PersistentVolumeClaim (PVC) is a request for storage by a user that can be fulfilled by a PV. PersistentVolumes and PersistentVolumeClaims are independent from Pod lifecycles and preserve data through restarting, rescheduling, and even deleting Pods.
Objectives
- Create PersistentVolumeClaims and PersistentVolumes
- Create a
kustomization.yamlwith- a Secret generator
- MySQL resource configs
- WordPress resource configs
- Apply the kustomization directory by
kubectl apply -k ./ - Clean up
Before you begin
You need to have a Kubernetes cluster, and the kubectl command-line tool must be configured to communicate with your cluster. It is recommended to run this tutorial on a cluster with at least two nodes that are not acting as control plane hosts. If you do not already have a cluster, you can create one by using minikube or you can use one of these Kubernetes playgrounds:
To check the version, enterkubectl version. The example shown on this page works with kubectl 1.27 and above.
Download the following configuration files:
Create PersistentVolumeClaims and PersistentVolumes
MySQL and Wordpress each require a PersistentVolume to store data. Their PersistentVolumeClaims will be created at the deployment step.
Many cluster environments have a default StorageClass installed. When a StorageClass is not specified in the PersistentVolumeClaim, the cluster's default StorageClass is used instead.
When a PersistentVolumeClaim is created, a PersistentVolume is dynamically provisioned based on the StorageClass configuration.
hostPath provisioner. hostPath volumes are only suitable for development and testing. With hostPath volumes, your data lives in /tmp on the node the Pod is scheduled onto and does not move between nodes. If a Pod dies and gets scheduled to another node in the cluster, or the node is rebooted, the data is lost. hostPath provisioner, the --enable-hostpath-provisioner flag must be set in the controller-manager component. Create a kustomization.yaml
Add a Secret generator
A Secret is an object that stores a piece of sensitive data like a password or key. Since 1.14, kubectl supports the management of Kubernetes objects using a kustomization file. You can create a Secret by generators in kustomization.yaml.
Add a Secret generator in kustomization.yaml from the following command. You will need to replace YOUR_PASSWORD with the password you want to use.
cat <<EOF >./kustomization.yaml secretGenerator: - name: mysql-pass literals: - password=YOUR_PASSWORD EOFAdd resource configs for MySQL and WordPress
The following manifest describes a single-instance MySQL Deployment. The MySQL container mounts the PersistentVolume at /var/lib/mysql. The MYSQL_ROOT_PASSWORD environment variable sets the database password from the Secret.

apiVersion:v1kind:Servicemetadata:name:wordpress-mysqllabels:app:wordpressspec:ports:- port:3306selector:app:wordpresstier:mysqlclusterIP:None---apiVersion:v1kind:PersistentVolumeClaimmetadata:name:mysql-pv-claimlabels:app:wordpressspec:accessModes:- ReadWriteOnceresources:requests:storage:20Gi---apiVersion:apps/v1kind:Deploymentmetadata:name:wordpress-mysqllabels:app:wordpressspec:selector:matchLabels:app:wordpresstier:mysqlstrategy:type:Recreatetemplate:metadata:labels:app:wordpresstier:mysqlspec:containers:- image:mysql:8.0name:mysqlenv:- name:MYSQL_ROOT_PASSWORDvalueFrom:secretKeyRef:name:mysql-passkey:password- name:MYSQL_DATABASEvalue:wordpress- name:MYSQL_USERvalue:wordpress- name:MYSQL_PASSWORDvalueFrom:secretKeyRef:name:mysql-passkey:passwordports:- containerPort:3306name:mysqlvolumeMounts:- name:mysql-persistent-storagemountPath:/var/lib/mysqlvolumes:- name:mysql-persistent-storagepersistentVolumeClaim:claimName:mysql-pv-claimThe following manifest describes a single-instance WordPress Deployment. The WordPress container mounts the PersistentVolume at /var/www/html for website data files. The WORDPRESS_DB_HOST environment variable sets the name of the MySQL Service defined above, and WordPress will access the database by Service. The WORDPRESS_DB_PASSWORD environment variable sets the database password from the Secret kustomize generated.
apiVersion:v1kind:Servicemetadata:name:wordpresslabels:app:wordpressspec:ports:- port:80selector:app:wordpresstier:frontendtype:LoadBalancer---apiVersion:v1kind:PersistentVolumeClaimmetadata:name:wp-pv-claimlabels:app:wordpressspec:accessModes:- ReadWriteOnceresources:requests:storage:20Gi---apiVersion:apps/v1kind:Deploymentmetadata:name:wordpresslabels:app:wordpressspec:selector:matchLabels:app:wordpresstier:frontendstrategy:type:Recreatetemplate:metadata:labels:app:wordpresstier:frontendspec:containers:- image:wordpress:6.2.1-apachename:wordpressenv:- name:WORDPRESS_DB_HOSTvalue:wordpress-mysql- name:WORDPRESS_DB_PASSWORDvalueFrom:secretKeyRef:name:mysql-passkey:password- name:WORDPRESS_DB_USERvalue:wordpressports:- containerPort:80name:wordpressvolumeMounts:- name:wordpress-persistent-storagemountPath:/var/www/htmlvolumes:- name:wordpress-persistent-storagepersistentVolumeClaim:claimName:wp-pv-claimDownload the MySQL deployment configuration file.
curl -LO https://k8s.io/examples/application/wordpress/mysql-deployment.yamlDownload the WordPress configuration file.
curl -LO https://k8s.io/examples/application/wordpress/wordpress-deployment.yamlAdd them to
kustomization.yamlfile.cat <<EOF >>./kustomization.yaml resources: - mysql-deployment.yaml - wordpress-deployment.yaml EOF
Apply and Verify
The kustomization.yaml contains all the resources for deploying a WordPress site and a MySQL database. You can apply the directory by
kubectl apply -k ./ Now you can verify that all objects exist.
Verify that the Secret exists by running the following command:
kubectl get secretsThe response should be like this:
NAME TYPE DATA AGE mysql-pass-c57bb4t7mf Opaque 1 9sVerify that a PersistentVolume got dynamically provisioned.
kubectl get pvcNote: It can take up to a few minutes for the PVs to be provisioned and bound.The response should be like this:
NAME STATUS VOLUME CAPACITY ACCESS MODES STORAGECLASS AGE mysql-pv-claim Bound pvc-8cbd7b2e-4044-11e9-b2bb-42010a800002 20Gi RWO standard 77s wp-pv-claim Bound pvc-8cd0df54-4044-11e9-b2bb-42010a800002 20Gi RWO standard 77sVerify that the Pod is running by running the following command:
kubectl get podsNote: It can take up to a few minutes for the Pod's Status to beRUNNING.The response should be like this:
NAME READY STATUS RESTARTS AGE wordpress-mysql-1894417608-x5dzt 1/1 Running 0 40sVerify that the Service is running by running the following command:
kubectl get services wordpressThe response should be like this:
NAME TYPE CLUSTER-IP EXTERNAL-IP PORT(S) AGE wordpress LoadBalancer 10.0.0.89 <pending> 80:32406/TCP 4mNote: Minikube can only expose Services throughNodePort. The EXTERNAL-IP is always pending.Run the following command to get the IP Address for the WordPress Service:
minikube service wordpress --urlThe response should be like this:
http://1.2.3.4:32406Copy the IP address, and load the page in your browser to view your site.
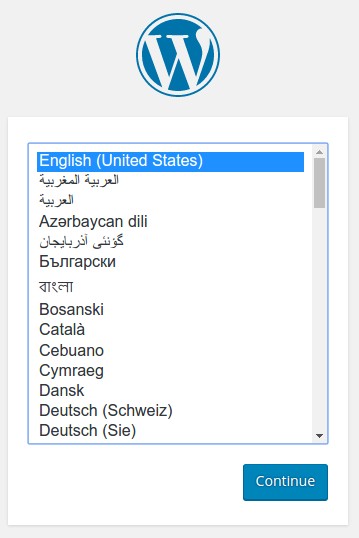
You should see the WordPress set up page similar to the following screenshot.
 Warning: Do not leave your WordPress installation on this page. If another user finds it, they can set up a website on your instance and use it to serve malicious content.
Either install WordPress by creating a username and password or delete your instance.
Cleaning up
Run the following command to delete your Secret, Deployments, Services and PersistentVolumeClaims:
kubectl delete -k ./
What's next
- Learn more about Introspection and Debugging
- Learn more about Jobs
- Learn more about Port Forwarding
- Learn how to Get a Shell to a Container