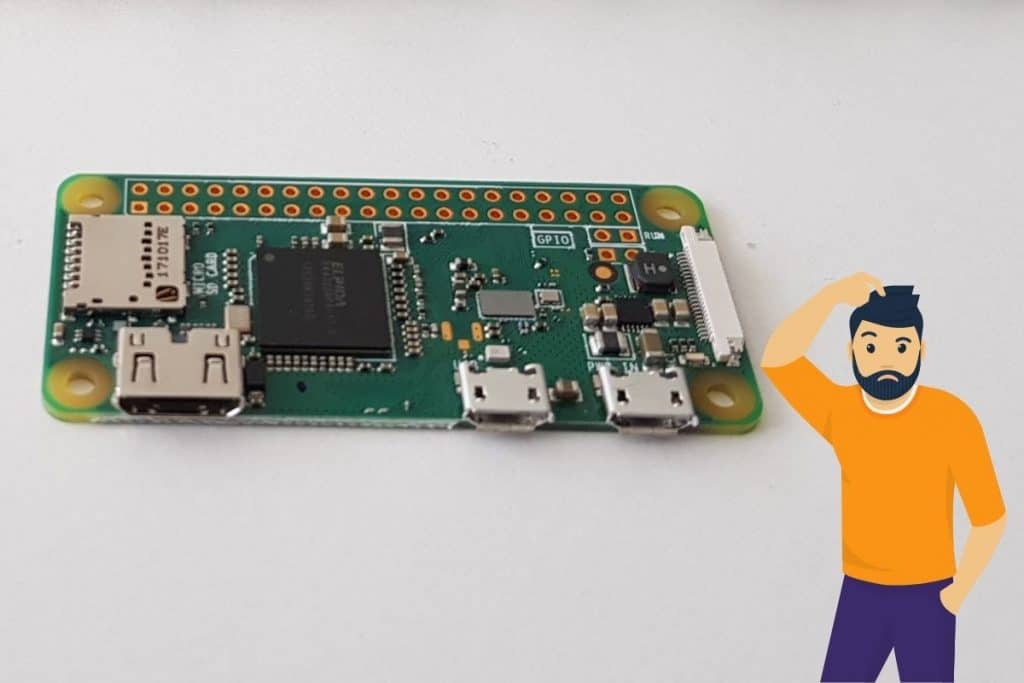
How to Install a Headless Raspberry Pi (No Monitor) in 2025
While the Raspberry Pi can be used as a desktop, it is also often used in projects without a monitor or keyboard plugged into it. In these projects, a bit of pre-configuration to skip the welcome wizard can help you gain access directly after the first boot.
The easiest way to pre-configure a Raspberry Pi for headless usage is to use the Advanced Options in Raspberry Pi Imager. By enabling remote access and pre-configuring the user, password and network, the Raspberry Pi will be immediately accessible on first boot.
And you’re in luck, as this procedure is now easier than ever. In this article, I’ll give you all the steps needed to make it work in no time (that’s what I do for all my tutorials).
If you’re new to Raspberry Pi or Linux, I’ve got something that can help you right away!
Download my free Linux commands cheat sheet – it’s a quick reference guide with all the essential commands you’ll need to get things done on your Raspberry Pi. Click here to get it for free!
Headless Setup Prerequisites
On the hardware side, you don’t need anything special to achieve your first headless setup:
- Any Raspberry Pi model: You can obviously pick the best model (like the Pi 5) for your specific project. But all models are compatible with the configuration I’ll show you later. Just make sure to pick one with the network access you want (e.g., Ethernet or wireless network).
- An SD card that you’ll overwrite: I recommend getting a different one than your existing system, so you can always get back to it if anything goes wrong. Here’s the best SD card according to my benchmarks.
You can also use a USB drive (like an SSD) if you want, the procedure will be the same. - Another computer with an SD card reader (or USB adapter), where you’ll follow the tutorial. It can be a Raspberry Pi if you don’t have another computer available (in this case, you need two SD cards + the USB adapter to plug both at the same time).
For your information, I’m testing this procedure with a Raspberry Pi 400, and this SD card (a good balance between price and performance).
On the software side, the only thing we need is Raspberry Pi Imager installed on the PC (or on Raspberry Pi OS). It’s the free software created by the Foundation to install a new system, and it’s available for all operating systems on their website.
How to Set Up a Headless Raspberry Pi
Luckily, there’s no longer any need to edit configuration files on the SD card directly. Raspberry Pi Imager now takes care of everything, so the procedure to pre-configure a Raspberry Pi is pretty straightforward:
- Follow the installation steps in Raspberry Pi Imager as usual.
- Edit the mandatory fields in the OS customization settings (credentials & network).
- Flash the OS to the storage.
Let’s see how to do this step-by-step.
Flash an OS With Raspberry Pi Imager
If you’ve already used Raspberry Pi Imager, the beginning is the same as usual. Just follow these steps to pick your operating system and storage device:
- (Optional) Select your Raspberry Pi model to filter the list.
It will filter the list of operating systems with only the ones compatible with your model. This makes it easier for you to pick the right one. - Click on “Choose OS” to select the system version to install.
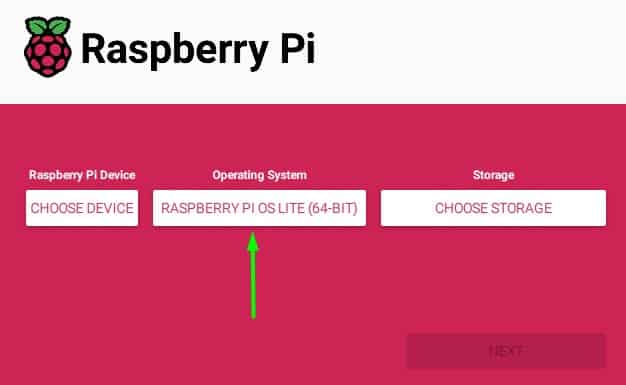
Raspberry Pi OS is recommended, as the advanced options given in this tutorial don’t necessarily work with all distributions. - Choose your media storage (SD card or USB).
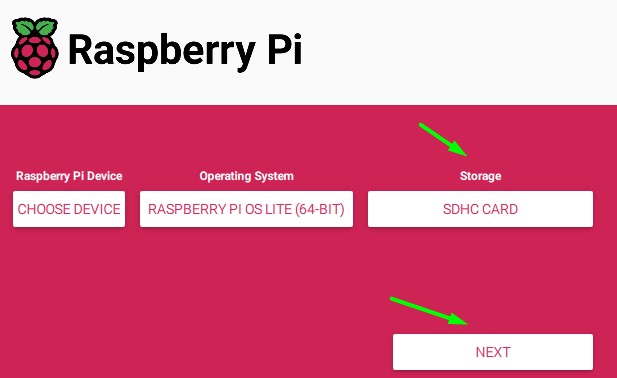
- Then click on “Next” to move to the next step.
Up to this point, there’s no difference between a headless setup and a traditional installation. Things begin to diverge in the next step.
Apply the OS Customization Settings
When you click Next, after selecting the operating system and storage, a popup will appear, asking you if you want to edit the default configuration:
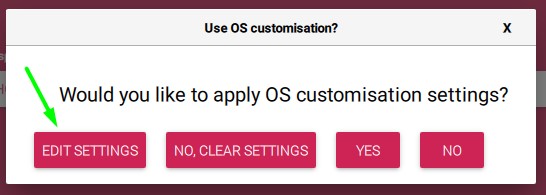
Click on “Edit Settings” to open the default configuration.
A form looking like this will appear:
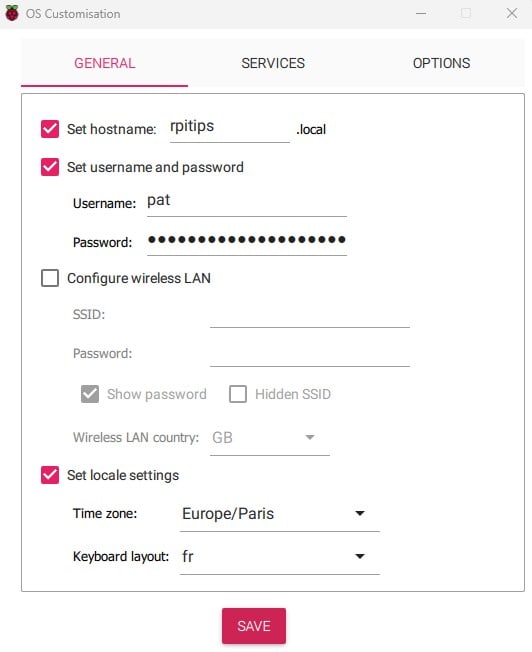
That’s where the magic happens.
The purpose of a headless setup is to skip the Welcome Wizard and be able to access the Raspberry Pi directly from a remote PC after the first boot. To do this, the username, password and network configuration must be set through the OS customization settings.
By default, Raspberry Pi OS won’t boot completely and will show the welcome wizard on first boot. To avoid this if you don’t use Ethernet, you also need to configure the Wi-Fi network in this form.
Make sure to fill this form with everything you need.
Then, click on “Services” to enable ssh:
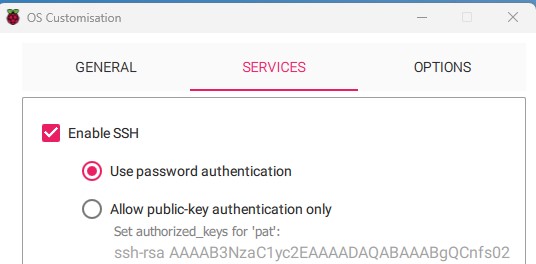
SSH is the remote access protocol that will give you access to the Raspberry Pi directly after the first boot. It’s not enabled by default, unless you check this box, and have a username and password set.
If you’ve done all the other steps but didn’t enable SSH, the Raspberry Pi will skip the Welcome Wizard, but you won’t be able to access the Raspberry Pi from another computer. So, this step is essential.
You might also like: Looking for a fun challenge? Start building your first Raspberry Pi robot!
Once all the configuration is done under “OS Customisation”, click on “Save” and proceed with writing the SD card. Imager will apply the settings directly to the SD card or USB drive.
Reminder: Remember that all the members of my community get access to this website without ads, exclusive courses and much more. You can become part of this community for as little as $5 per month & get all the benefits immediately.
First Boot and Raspberry Pi Access
When Raspberry Pi Imager has completed the flashing process, we can move and test our new configuration.
Start the Raspberry Pi
- Insert the SD into the Raspberry Pi (or plug your USB drive).
- Plug in the power supply.
- Wait about 5 minutes for the first boot to complete.
It’ll take more or less time depending on your system and Raspberry Pi model, but that should be enough in most cases.
Find Its IP address
If everything goes as expected, the Raspberry Pi should be assigned a new IP address by your network router (whether you use Ethernet or Wi-Fi doesn’t matter).
The issue is that, without a monitor, we can’t read it on the screen as usual, so we need to be a little smarter than that.
The first option is to open the web interface of your router (or DHCP server) and find the assigned IP address there. The second option (what I generally do), is to scan the network for all connected devices, using a command like “nmap” or a tool like Advanced IP Scanner:

In this screenshot, you can see that the tool has found several devices on my network, with one of them matching the hostname I set under “OS Customisation” earlier. That’s my Raspberry Pi, with the IP address 192.168.0.13.
I explain everything in more detail in this article if you need more details: 7 Easy Ways to Find Your Raspberry Pi IP Address
Access via SSH
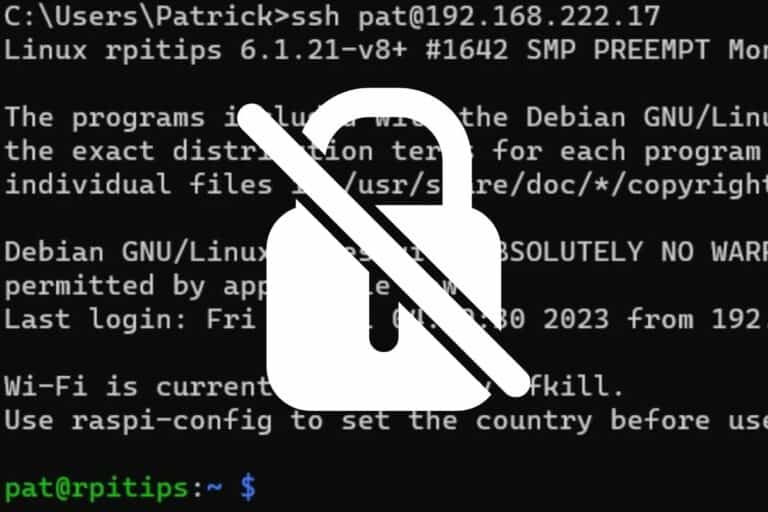
Once the Raspberry Pi has fully started up, and you know its IP address, you can access its terminal via SSH.
I won’t explain everything here, as I have a full guide about SSH on Raspberry Pi, but basically, you can use your favorite SSH client, type the IP address found in the previous step, and enter the username and password set during the installation to access it.
Once connected via SSH, you can do everything in command lines, install new packages, and really start your main project.
Going Further
If you installed an operating system with a GUI, the next step might be to install one of the remote access solutions available on Raspberry Pi. This will give you access to the full interface, not only the terminal and command lines.
The recommended option currently is to use VNC. It can be enabled easily on Raspberry Pi OS via raspi-config:sudo raspi-config

Once done, you can use a VNC client (like TigerVNC) and connect to the Raspberry Pi to see all the menus and graphical displays, as if the Raspberry Pi was using your computer screen.
I explain everything in this VNC tutorial I recommend reading if you’ve never done this.
And now that you know how to quickly set up a new Raspberry Pi system, with everything configured, it’s time to level up your game and try one of these projects:
- All The Best Raspberry Pi Project Ideas (with links)
- 15 Raspberry Pi Network Projects for Home and Office Use
- 15 Easy Projects for Raspberry Pi Beginners (With Links)
- 7 Hidden Raspberry Pi Features You Should Be Using
Whenever you’re ready, here are other ways I can help you:
The RaspberryTips Community: If you want to hang out with me and other Raspberry Pi fans, you can join the community. I share exclusive tutorials and behind-the-scenes content there. Premium members can also visit the website without ads.
Master your Raspberry Pi in 30 days: If you are looking for the best tips to become an expert on Raspberry Pi, this book is for you. Learn useful Linux skills and practice multiple projects with step-by-step guides.
The Raspberry Pi Bootcamp: Understand everything about the Raspberry Pi, stop searching for help all the time, and finally enjoy completing your projects.
Master Python on Raspberry Pi: Create, understand, and improve any Python script for your Raspberry Pi. Learn the essentials step-by-step without losing time understanding useless concepts.
You can also find all my recommendations for tools and hardware on this page.